Saturday, April 18, 2009

S'MORE BROWNIES ANYONE?

I had so many of my readers tell me that they made and really enjoyed the Chocolate Chip Cookie Brownies that I posted. So I decided to add S’more Brownies for everyone to look at, drool over, and to try.

One of my favorite things to do in the summertime is go camping. Well, not really. But I do enjoy the s’mores that usually go along with all of our camping trips. Since it is not quite warm enough to do the camping thing yet, I decided to make brownies with a s’more twist. I think you will really enjoy them. We sure did! I asked each of my children (my little bakers in training) to tell me how they would describe these brownies after they took the first bite…….

Erin said, “Delicious, gooey, and better than good!”

Ryan said, “Yummy and gooey. They really do taste like S’mores!”

Ashley said, “I like them, but they are so gooey Mom. They are yummy in my tummy.”

Adam said, “More…more….more…..”

So that about sums them up. They were simple to make. A bag of marshmallows, a boxed brownie mix, some graham crackers, a little butter, and some sugar is all it took to make these delicious wonders.

I started by making a graham cracker crust. I crushed about 16 graham crackers, and mixed them with ½ cup of butter, and ¼ cup of sugar. I pressed it into a 9X13 inch pan and let it bake for about 7 minutes. Next, I mixed up the brownie mix (according to the directions on the package), and poured it on top of the graham cracker crust. Then I baked it according to the package directions as well.


After the brownies cooled, I stacked large marshmallows over the entire top and stuck them under the broiler just long enough to toast them. Mmmmm…… It even smelled like the toasted marshmallows from camping.


I really loved them, but when I make them again, I think I will cut the marshmallows in half or use mini marshmallows instead. That might reduce some of the gooey-ness. But if you like gooey-ness, you will love the large marshmallows! I hope you try them out. Let me know what you think.

Tuesday, April 7, 2009

Thank You Bakerella!!!

Bakerella is famous for her Cake Pops. She makes really cute pops for all of the holidays, and this time around I couldn’t resist trying them! My friend Sara and I spent an entire day decorating our cute little creations (some of which are pictured above).

We started by baking cakes from a cake mix. After the cakes baked and cooled, we crumbled them into a bowl and mixed them with frosting. Next, we rolled them into balls (about the size of a quarter). The balls needed to go in the freezer for a few minutes while we melted our candy melts. It was necessary to dip the lollipop sticks into the chocolate melts before putting them into the balls. This made it so the balls wouldn’t fall off the sticks. Once the balls were all on sticks, we placed them into foam blocks and put them back into the freezer. After a few minutes we were able to dip the cake pops into candy melts and decorate away. It’s amazing what you can do with cake sprinkles and confetti! For more details on how to make Bakerella’s Famous Cake Pops check out her website at http://bakerella.blogspot.com/2008/08/hope-these-put-smile-on-your-face.html


Saturday, March 21, 2009

Cake and Cookie Decorating Birthday Party

I got asked to teach cake decorating at a birthday party last night!  I was totally in my element, not only with the cake decorating, but I love to hang out with the young girls. They are always so much fun to be around.  I guess it makes me feel young again.  My daughter was invited to this party and came home saying it was one of the best parties she had ever been to, so that was great to hear.  I think everyone had a good time.  I know I did.

At the beginning of the party, each girl got to paint a pot in bright Spring colors (since it was the first day of spring).  They got pretty creative, and the pots were all very cute and unique.  It was fun to see their personalities come out while painting.


While the adorable pots were drying, the girls were given aprons to decorate.  All cake decorators need a good apron!


The girls even posed for a picture sporting their new aprons.


Next, I showed them a few cake decorating techniques using a delicious buttercream frosting, and various tips.  I taught them a lot of the basics.


I had sugar cookies on sticks for them to decorate.  They all did an AWESOME job.  It was fun to see how different all of the cookies were.  There sure was a lot of giggling going on.


The end result was phenomenal!  The cookie bouquets turned out really well, and everyone had a great time.


Sunday, March 15, 2009

Banana Split Cake

Last weekend I took a trip to Denver to spend some time with my sister. We always have so much fun together. One of the things that we like to do when we get together is shop. So, we went to a couple hobby and home décor stores, and I came across a set of mini cake pans that I couldn’t pass up. I know, I know….I’m starting to wonder why I get so excited about such things. But I HAD to have this set. It is the Wilton Tasty-Fill Mini Cake Pan Set.

The set has 4 mini pans, and a recipe booklet. I immediately went to the recipe book to see what I could make, and this is what I came up with…….


A DELICIOUS BANANA SPLIT CAKE!!! Now if I have you drooling over your computer screen, keep in mind that you (YES YOU!) can also make this cake. I will tell you step by step how to make it.

I started out with a basic banana cake recipe:

½ Cup Butter (softened)

1 Cup Sugar

1 egg

½ Cup Butter Milk

1 Cup Mashed Bananas

1 t. Soda

2 Cups Flour

¼ t. Salt

**Cream sugar, egg, and butter. Add bananas and soda. Add balance of ingredients. Mix well. Next put ½ cup of batter into each mini cake pan. Bake at 350 degrees for 20-25 minutes. Let cool before taking cakes out of pans.

Wrap the cakes in plastic wrap and put them in the freezer for a couple hours. Then pull them out to put the filling in, which is softened strawberry ice cream. Mmmmm….. After filling with strawberry ice cream, stack 2 cakes together (so the filling is inside). Return them to the freezer so the ice cream can set back up. Just before you are ready to serve these delicious little delicacies, pull them out of the freezer and frost with whipping cream. The only thing that could make this any better would be chocolate, but….. You are in luck! You pour ice cream toppings on top of the whipping cream. On this particular cake I used chocolate, strawberry, and caramel toppings. I also chopped up some peanuts, and topped it off with a cute little cherry. DELICIOUS!!!


Now, if you would like to give this cake a try, you can click on the link over to the left of my blog to purchase these fun pans. I imagine I will be using mine a lot!


Monday, March 2, 2009

Raspberry Lemon Gem Cookies

DON'T THESE LOOK DELICIOUS?

Most of us have made cookies before using a cake mix. Well, that's what I did this time around, but I put my own twist on things. I have always liked lemon cakes with raspberry filling, so I thought I would try a lemon COOKIE with a raspberry filling. I started with a lemon cake mix. Next I added 2 eggs, 2 Tablespoons Canola Oil, 2 Tablespoons water, and a teaspoon of Vanilla Flavoring. After mixing all the ingredients together, I dropped the dough by the teaspoonful on a lightly greased cookie sheet. I made a well in the center of each cookie, which I did by pressing in a greased melon baller. I'm sure there are other ways to do it. Then I put seedless raspberry preserves in the center of each one.


I baked them at 350 degrees for about 10 minutes. After they cooled completely, I melted white chocolate and drizzled it on top of the cookies. What an AWESOME finish to an AWESOME cookie! These cookies were a perfect Family Home Evening treat. Definitely give them a try, and let me know what you think. MMMMMM......

Friday, February 27, 2009

FuN FuN FuN


The first 3 people to respond to this post will get something made by me!
My choice.
For you.
This offer does have some restrictions and limitations:
1- I make no guarantees that you will like what I make!
2- What I create will be just for you.
3- It'll be done this year.
4- You have no clue what it's going to be.
5- I reserve the right to do something extremely strange.
The catch is that you must repost this on your blog and offer the same to the first 3 people who do the same on your blog.
The first 3 people to do so and leave a comment telling me they did win a
FAB-U-LOUS homemade gift by me!
Oh, and be sure to post a picture of what you win when you get it! Who's in?

Thursday, February 26, 2009

Fruit Pizza...A Perfect Spring Dessert

This is one of those desserts that I absolutely love, but have never made before. As I was grocery shopping the other day, I came across a display of blueberries and strawberries on sale. I couldn't pass up a good deal on such delicacies. So, thus came the FRUIT PIZZA!


This was such an easy treat to make. A simple sugar cookie dough created the base. And it was topped with a cream cheese frosting. After a little slicing, I loaded all the fruit on. Mmmm......


I will definitely be earning "Brownie Points" (or should I say "Pizza Points") with the family tonight.

Tuesday, February 17, 2009

Delicious Chocolate Chip Cookie Brownies

I found a blog that I really enjoy reading on a regular basis. It is www.bakerella.blogspot.com. On her blog, Bakerella offers a lot of cute, fun, and delicious recipe ideas for others to try. I saw this recipe and had to give it a try.


You simply make your favorite brownie recipe, and your favorite chocolate chip cookie recipe. Take big spoonfuls of the cookie dough and press it into the brownie batter. Looking good, right? Oh, it gets even better.


After they bake, you need to let them cool completely. Then pour on some chocolate ganache. (I will include my chocolate ganache recipe at the bottom of this post)


You need to allow the chocolate ganache some time to set up before you cut into it. I know, you need a lot of patience! But it is all worth it in the end. Mmmmmm.......


Don't they look AWESOME? They were fun to make, and they taste great too.

Chocolate Ganache Recipe
8 oz. Semi Sweet Chocolate (I used semi sweet chocolate chips)
3/4 Cup Heavy whipping cream
2 Tablespoons Butter
1/2 t. vanilla (optional)

Bring the whipping cream and butter to a boil over medium heat. Pour over the chocolate in a bowl. Cover and let sit for 5 minutes. Whisk until blended and creamy. Pour over your brownies, or whatever dessert you are making. Let it set up and you are good to go. This recipe can also be used to make chocolate truffles.

Thursday, February 12, 2009

Valentine Mint Brownie Bites

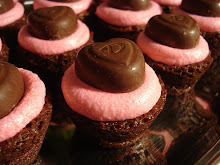
I made these Mint Brownie Bites to give out to friends and family for Valentine's Day. I started by making brownies in mini muffin tins. Next I made a buttercream frosting and added pink food coloring and a drop of mint extract. I topped off the treat with a heart-shaped Dove chocolate. Simple and Delicious!

Give this treat a try, and let me know what you think. Also, if you have some good Valentine's Day treat ideas of your own, I would love to hear about them. HAPPY VALENTINE'S DAY!

Monday, February 2, 2009

Dad's Favorite Cake To Make

Jim loves to make the kids his famous Ice Cream Cake for their birthdays! It seems to be the favorite dessert at our house. He starts with just a brick of ice cream, and tops it with bananas, scoops of more ice cream, whipping cream, and any kind of topping you can think of. With this cake, you have to sing "Happy Birthday" and blow out the candles really fast. Otherwise you end up with Birthday Soup. What a delicious treat!

Friday, January 30, 2009

Panda Cupcakes for a Kickin' Kung Fu Panda Party

This year we decided to surprise Ryan with a Kung Fu Panda birthday party. He had no idea we were going to do this. We invited a bunch of his friends over for the excitement. Each of the kids were given a foam sword and a balloon. They were asked to keep the balloons off of the ground, and they could only use their swords. It turned into a giant sword fight, but the kids had a blast! After the sword game, each of the kids were able to make an oragami frog. Then they were given a bowl of noodles and chopsticks, where they had to eat the noodles only using the chopsticks. Then they got to eat the yummy panda cupcakes (which were decorated with mini oreos and mini chocolate chips) and ice cream. Party favors were given out in Chinese "Take Out" boxes. What a fun party!


Happy Birthday Ryan!!!

Saturday, January 17, 2009

M*A*S*H Cake

This cake was requested for a M*A*S*H themed birthday party. It is a carrot cake with cream cheese filling and toasted pecans. It should be pretty delicious!

Thursday, January 8, 2009

The Making of the Tree Cake


I've had a lot of people ask me how I made the Christmas Tree Cake, so I decided to post pictures of the making. There is a one-inch dowel going down the center, and then I supported each layer with small dowels. The trunk of the tree was a 6 inch round cake. The three tree levels were 12", 10", and 8". Each a different flavor, and trimmed just to the right size (thanks to my hubby who drafted it out in Auto Cad for me). Each level was crumb coated with a butter cream frosting, and covered with a home made marshmallow fondant. I painted the fondant with an edible luster dust which gives it a shine. The round decorations were cut out of fondant, and the swirls were piped on with a green butter cream. The tree skirt is made with fondant, and the fringe was piped on with frosting using a grass tip. This was such a fun cake to make. I'm aching to make another creation.

Tuesday, December 23, 2008

Christmas Tree Cake


Here is the Christmas Tree cake that I made this weekend. The trunk and bottom layer were both chocolate cake with a chocolate cream filling. The middle layer was a lemon cake, and the top layer was a white cake. It was very cute and very delicious! Be sure to click on the picture to get a better look at the details.
Posted by Picasa

Monday, December 1, 2008

Family Fun With Gingerbread


Every year we let the kids decorate gingerbread cookies to hang on the Christmas tree. Here are the creations for this year's tree. Along with the cookies, the kids also make paper chains, and popcorn strings to decorate with. This is one tradition the kids will never forget. The kids are proud of their home made decorations!
Posted by Picasa

Sunday, November 9, 2008

R2D2 Cake

Here is the cake in progress. The body is made up of white cakes filled with a lemon cream cheese filling. The round top is also a white cake, and the legs are made with rice crispy treats. They were then crumb coated with buttercream frosting, and finished off with a lemon flavored marshmallow fondant.

Here he is all finished and ready for Alex's birthday party. He was definitely the hit of the party!


Saturday, October 25, 2008

My Decadent German Chocolate Cake With Dutch Chocolate Ganache


So here is the cake that I've been aching to bake. It was very rich and very delicious! German Chocolate Cake with a Dutch Chocolate Ganache. The filling was made by carmalizing Sweetened Condensed Milk and adding toasted pecans and toasted coconut. I will definitely be making this one again!

Sunday, September 21, 2008

Ashley's Castle

A beautiful castle for a beautiful little princess. Both the 10 inch and 6 inch layers were made with a strawberry cake, because Ashley's favorite color is pink. The filling was a strawberry mousse, and it was topped with buttercream frosting. It was quite delicious!

Friday, September 12, 2008

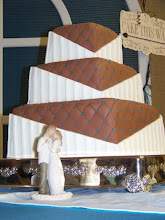
Amanda's Wedding Cake

This is my first wedding cake, and it was SO much fun to make! I'm so glad I had the chance to do it.

Friday, August 1, 2008

A Monster Truck Jam for Adam!


A 16 inch cake for a 1 year old??? I wanted to practice making a large cake, so therefore Adam got it for his Birthday. The cake was really moist, with 38 eggs, 16 cups of sugar, 5 cups of butter, and 16 cups of flour, among other ingredients. It is an almond flavored white cake with a chocolate mousse filling. It is topped with a green buttercream frosting and chocolate ganache. The dirt is so lifelike! Everybody thought that I brought it in from the garden. It is actually crushed graham crackers and oreos. Oh, and the candy rocks are edible. The cake tasted even better than it looks! Adam sure enjoyed it.

Wednesday, June 4, 2008

I Went A Little Topsy Turvy!


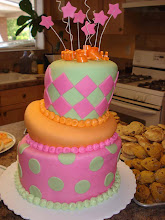
For Erin's Birthday and Baptism I decided to make her a Topsy Turvy cake. Each level has chocolate cake, white cake, and strawberry cake with a buttercream filling. This whimsical cake was a big hit at the party!

Wednesday, April 23, 2008

Gumpaste and Fondant Class

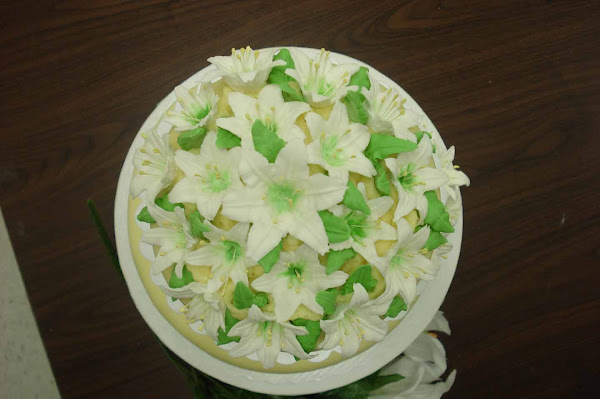
Here is my final cake for the Gum paste and Fondant Class. It is a cherry chip cake with an almond buttercream filling. I topped it with a home made marshmallow fondant. The daisies were also made out of fondant. I have taken all four courses that Wilton has to offer, and I loved each one. I would highly recommend them to anyone.

Tuesday, March 25, 2008

I FINISHED COURSE TWO!


Well, I did it! Tonight I finished the Wilton Course 2 at Hobby Lobby. The instructor was Lori Cottrell, who made it a lot of fun. Throughout this course I mainly learned how to make flowers out of frosting and royal icing. My final cake was an oval strawberry cake with a cream cheese filling. It had basket weaving on the sides and a rope border. All of the flowers are made with royal icing. The flowers include Apple Blossoms, Violets, Mums, Daffodils, Victorian Roses, Pansies, Daisies, Primroses, and Rose Buds. I really enjoy decorating cakes and can't wait to start Wilton Course 4 at Hobby Lobby next week. It is a gumpaste and fondant class, which will run four weeks.