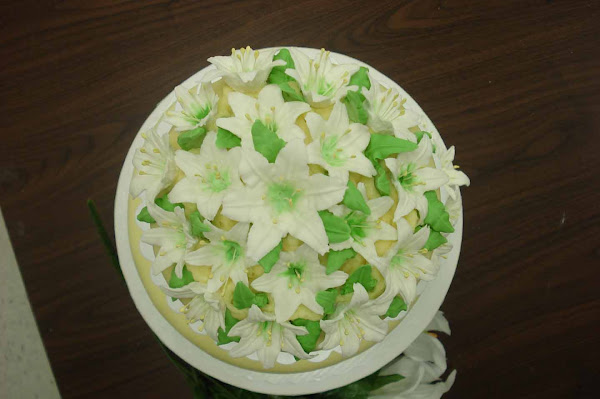
Thursday, August 2, 2012

"Hey, Where's Perry???"

What do you get a 5-year old who loves Phineas and Ferb?  My little Adam turned 5 yesterday, so we decided (at the last minute) to throw him a "Where's Perry" birthday party.

He was thrilled to get some new PEZ dispensers!

He also got the Perry Files...

And, he got many other gifts that he absolutely LOVES!  In fact, he woke me up about 3 times in the night asking when it was going to be morning so he could play with his birthday presents.

His 12-year old sister made him an ADORABLE banner!  I knew if anybody could pull off a cute "Perry" poster, Erin could do it.

We also made him a "Perry The Platypus" Cake!
The base cake was a 14-inch round chocolate cake with a chocolate fudge frosting.  Perry was also made out of chocolate cake.  The cake was definitely the "hit" of the party!

Happy Birthday little buddy!  We can't believe that you are already 5 years old.  We love you so much!!!
Hey...... Where's Perry?

Tuesday, October 25, 2011

Spiced Cake Doughnuts


I found a recipe today from Taste of Home to make Spiced Cake Doughnuts.  Having never made doughnuts before, I was really excited to make these.  The kids and I got right to work.

Spiced Cake Doughnuts
Ingredients:
1/4 Cup Shortening
1 Cup Sugar
3 Eggs
1 teaspoon Vanilla Extract
5 Cups All-purpose Flour
3 teaspoons Baking Powder
2 teaspoons Salt
1 teaspoon baking soda
1 teaspoon ground Cinnamon
1 teaspoon ground Nutmeg
1/4 teaspoon ground mace
1/2 cup Buttermilk
1 Cup Grated Peeled Apples
Oil for deep-fat frying

Browned Butter Frosting:
1/2 Cup Packed Brown Sugar
3 Tablespoons Butter
1/4 Cup Heavy Whipping Cream
1-3/4 Cups Confectioners' Sugar
Colored Sprinkles

Directions:
In a large bowl, cream shortening and sugar until light and fluffy.  Beat in eggs and vanilla.  Combine the flour, baking powder, salt, baking soda,  cinnamon, nutmeg and mace; add to creamed mixture alternately with buttermilk, beating well after each addition.  Fold in apples.  Cover and refrigerate for at least 2 hours.

On a lightly floured surface, roll dough to 1/2-in. thickness.  Cut with a floured 2-1/2 inch doughnut cutter.  In an electric skillet or deep-fat fryer, heat oil to 375 degrees.  Fry doughnuts, a few at a time, until golden brown on both sides.  Drain on paper towels.

In a small saucepan, bring brown sugar and butter to a boil.  Cook and stir for 1 minute or until lightly thickened.  Pour into a small bowl; let stand for 10 minutes.  Add cream; beat until smooth.  Gradually add confectioners' sugar, 1/4 cup at a time, beating well after each addition until frosting achieves desired consistency.  Frost doughnuts; top with sprinkles.  Yield:  22 doughnuts.

These doughnuts were a big hit at my house!  For me, the frosting was the best part.  What a great Fall treat!

Monday, October 24, 2011

Pumpkin Shaped Chicken Rolls


Today we went to a party at my mom's house, and I was asked to take something to eat with a Fall/Halloween theme.  This is what I came up with.....
Pumpkin Shaped Chicken Rolls!

Aren't they cute?  And they were delicious too.  This is how I made them....

I started out by making my favorite roll recipe, and adding orange food coloring.

NEVER FAIL ROLLS
4 1/2 Cups flour
1/2 Cup Sugar
1/4 Cup Warm Water
1/2 Cup melted Butter
1 Cup warm water
2 Yeast Cakes (2 Tbsp.)
1 tsp. Salt
3 Well Beaten Eggs

Add yeast to 1/4 cup warm water and stir until dissolved.  Add beaten eggs, sugar, 1 cup water, salt, and melted butter.  Mix well.  Stir in flour making a soft dough (will be slightly sticky).  Cover and let rise to double in bulk.  Punch down and place covered in refrigerator.  Will keep 48 hours in the fridge.  Roll out into rolls and let rise one hour before baking at 400 degrees for 10 - 15 minutes.

I rolled my dough out onto a floured surface, and cut out cute little circles.

Then I scooped Chicken Filling onto the center of each one.

Here is my Chicken Filling Recipe.....
Chicken Filling
2 Cups cooked cut-up boneless chicken
3 ounces cream cheese
2 Tablespoons Melted Butter
1 Tablespoon Chopped Chives or Onion
2-3 Tablespoons Milk
1/4 teaspoon Salt
1/8 teaspoon Pepper

Mix All Ingredients Together In a Bowl.

After scooping the chicken filling on all of the circles, I folded them up into balls.  
***Make sure you pinch the seams tight, and put the seams face down on the pan.***

I diced up celery to use as my stems, and I placed them on top without poking a hole in the role. 
 They turned out perfect.

I baked them for about 12 minutes at 400 degrees.


Ahhhh.....Just Beautiful!


Tuesday, September 27, 2011

Ashley Turns Seven With The Painted Otter!!!

Do you remember a couple of years ago when I posted about a Cupcake Decorating Birthday party?  Well, we did it again!  Ashley had another AWESOME birthday.  She was able to share it with so many of her good friends.  


At this party, the kids were able to use their creativity to decorate cupcakes and cookies.  They had so many options to choose from!  Pink, white, or chocolate cupcakes and sugar cookies (some regular, and some gluten free).  Chocolate or white frosting.  And oodles of candy to top them with.  All of the creations were unique and delicious!


The highlight of the party was Melissa from THE PAINTED OTTER!


Melissa is a super talented artist who just started her own face painting business.  I can't even put in to words how amazing her work is.  Not only does she paint well, she is really good with kids.  All of these little girls were so excited to get their faces painted.


She puts in so much detail.


And each design was unique....


.....and colorful.


Some had creatures...


...and some were just plain cute!


This party was a big SUCCESS!


THANK YOU SO MUCH MELISSA!

Right now The Painted Otter is having a drawing for a free deluxe Halloween face paint job.  It is a $20 value!  Alright my friends, all you have to do is like "The Painted Otter" on Facebook or subscribe to The Painted Otter's Blog.  I would love for you to enter, and so would Melissa.


Wednesday, March 9, 2011

Vote For Me!!!


I was recently nominated for Babble's Top 100 Food Mom Bloggers.  I would love it if all of my dear friends could vote for me!  Click Here to vote now.  Thanks for all of your support!

Saturday, February 19, 2011

An Edible Animal Cell Model


My friend's son had an assignment for school where he was required to make a 3d animal cell model.  It had to have all of the cell parts, such as the Nucleus, Nuclear Membrane, Mitochondrion, Golgi Bodies, etc.  He was told that he could make the model out of anything as long as it wasn't something that could get smelly in a couple of days.  Since one of his favorite shows is "Cake Boss", he decided he wanted to make it out of Rice cereal and fondant.  He came over tonight so that I could teach him how to work with fondant.  It was a lot of fun!  After showing him what to do, it was fun watching him create his animal cell.  I think it turned out great!  His work was phenomenal.  What do you think?

Wednesday, February 2, 2011

Pink Cupcakes...... A lot of Pink Cupcakes!


Today I made 6 dozen cupcakes. They were for a Young Women New Beginnings.  I thought they turned out great.  They were frosted with about 5 different shades of pink frosting.  And.....they were DELICIOUS, if I do say so myself!  I experimented with the frosting and made it using butter, heavy whipping cream, milk, vanilla, and powdered sugar.  I really think it was the best tasting frosting I have ever made.


Now on to my next project....  A Girl Scout Thin Mint cake.

Tuesday, February 1, 2011

Cake Pops....Ryan's Class Treat


I have been a room mother many times in my kids classrooms.  Our school has a rule that  you have to take treats that are store-bought.  Well, I recently learned that if you have a Food Handler's Permit you can make treats at home.  It's amazing that I just barely figured this out.

Anyway, I am the proud owner of a Food Handler's Permit.  So, to celebrate Ryan's birthday I made cake pops for his class.  Cake pops are some of my favorite treats to make.  I didn't get too fancy with them, but I think the 8 and 9 year old kids in his class will LOVE them.

Happy 9TH Birthday, My Dear Ryan!

You can check out more of my cake pops HERE.

Friday, January 28, 2011

One Of My Favorite Blogs......

There is a blog that I love to follow, because it always has a lot of good and easy recipes.  I follow it by email, and look forward to each new post.  And it really is one of my favorites.  She is right up there with Pioneer Woman and Bakerella.  Well, not too long ago, Tina at Mommy's Kitchen did a post on Sour Cream & Cherry Coffee Cake.  Her post and pictures were AMAZING........enough to make anyone want to try it.  Doesn't it sound heavenly?  I had to give it a try because not only did it look delicious, but it looked simple to make.  I like anything simple.  

It only takes a few ingredients....


Here is Tina's Recipe........

Sour Cream & Cherry Coffee Cake
1 - 18 oz package white cake mix (I used a yellow mix, because that is what I had on hand)
1 - 8 oz container sour cream
3 - eggs
1/4 - cup water
1 - can cherry pie filling
1/4 - cup sliced almonds, optional

Preheat oven to 350. Lightly grease a jelly-roll pan or 9 x 13 inch baking pan. Mix together the sour cream, eggs and water. Combine with the cake mix. Spread mixture into a greased baking dish and drop the pie filling over the batter in spoonfuls.

Make sure to swirl the pie filling throughout the batter. If not the pie filling will settle in the middle.Bake for 30-40 minutes or until lightly browned and cooked through. Test with toothpick for doneness. Cool in pan and drizzle with a simple icing if desired.


Simple Icing
1 ½ - cups powdered sugar
2 - tablespoons milk
½ - teaspoon vanilla or almond extract

Blend all the ingredients together until smooth. Drizzle over coffee cake and garnish with sliced almonds.


I went right to work making my own.

Here is my Sour Cream & Cherry Coffee Cake

I also made.......

Sour Cream & Apple Coffee Cake

and.......

Sour Cream & Blueberry Coffee Cake

I was so excited that I could substitute the cherry pie filling for other flavors.  They were all so delicious, but my very favorite was the apple.  You will have to give them a try and let me know what your favorite is.

Friday, January 14, 2011

Bread Making.........Addictive?

I think so!  And I'm not the one addicted.
My daughter just finished her Science Fair Project, and she did it on the accuracy of measuring when making bread.  She had several people scoop a cup of flour. She determined that even though the same measuring cup was used, the amount was not always the same (due to packing or not packing, leveling or not leveling).  Give or take about 6%.


She ended up making 3 batches of bread.  But instead of measuring the flour with a cup, she weighed it in grams.  Her first batch had the right amount of flour.  Her second batch had 6% too little flour.  And her third batch had 6% too much flour.  


Next she had people taste the bread to determine if they could tell which one had the right amount of flour.  The tasters liked all three, but the one with the exact amount of flour won the game.  Good job Erin for a project well done!

My husband has really taken a liking to Erin's bread.  The project was due last week, and he has made 3 or 4 batches of bread since then.  So, as you can see, he is the addicted one......and it is WONDERFUL!  


My house smells so good.  Simplicity is the key.  This bread recipe is very easy to make, and it tastes great.  The crust is nice and crunchy, and the inside is so soft that it melts in your mouth.  Did you know it only has 4 ingredients?  Yeah, I was surprised too.  Here is the recipe.....

1000 grams bread flour
20 grams salt
14 grams dry activated Yeast
600 grams of water

That's it!  That's all you need.  Now, grab a bowl and get ready to make this wonderful bread.  

1. Place all of the dry ingredients in a large bowl and give them a dry mix with a spoon.

2. Make a well in the center and pour in the water.

3. Gradually stir the flour into the water until it is all incorporated. Flour can vary or even humidity can make a difference so you might find you need to add a little more flour or water to produce a workable dough. You don't want it too sticky or to tough to work with.

4. It's time to get your hands dirty. Turn your dough out onto a floured surface. A board or even just your table top is fine. Start kneading the dough. Feel free to stretch, pull or punch the dough in all directions.  Then roll it back up and stretch, pull or punch again. Any technique you choose will be fine, just keep working the dough for about 10 minutes until it is even in texture. Now roll the dough into a ball and place it into a lightly greased container that can be covered. You can use your mixing bowl if it has enough room for the dough to double in size, or use a large plastic container or even a bucket. Cover with a lid, plastic wrap or a damp towel.

5. Place the dough in a warm place (not too hot, yeast starts to die above 50 C) until it doubles in size. This will take about 1 hour. Don't worry if you can't find a spot warm enough, it will still rise but it will just take a little longer.

6. Once your dough has doubled, punch it down and take it out of the container. Now divide it into 2 even portions. Press the pieces out flat and then roll into loaf shapes.

7. Place the dough pieces into large loaf tins and cover again to allow to rise. Plastic wrap or a damp towel will be fine. Sit in a warm place and allow the dough to rise until it reaches the top of the tin. While the dough is rising, preheat your oven to 230 C (450 F)

8. Once the dough has reached the top of the tin remove the cover and place in your pre-heated oven for 30-40 minutes. You can check if it is baked by knocking on the crust and listening for a hollow sound.

9. Remove from tins and allow to cool on a wire rack.


Enjoy your bread!

Tuesday, December 14, 2010

By Request.....

Chocolate Candy Cane Cupcakes!


I have received many emails and messages asking for the recipe to these delightful treats.  I made them using a chocolate cake mix,  but what makes them extra special is the candy cane filling and the Chocolate Peppermint frosting.  So, I hope you give them a try.  They really are DELICIOUS!


Candy Cane Filling

8 ounces Cream Cheese (at room temperature)
1/2 Cup Confectioner's Sugar
1/4 Cup Heavy Cream
4 ounces White Chocolate (Melted)
Crushed Candy Canes

In a medium sized mixing bowl, beat cream cheese until smooth.  Add confectioner's sugar and blend well.  Add cream and white chocolate.  Beat until fluffy.  With a spatula, fold in 3-4 Tablespoons of crushed peppermint.

I used the Wilton Tip #230 to fill the cupcakes with.  Be sure to crush the candy canes pretty fine so that they will go through the tip easily.


Chocolate Peppermint Frosting 

1 Stick Butter
6 Tablespoons Milk
4 Tablespoons Cocoa
3 Cups Powdered Sugar (approximate)
1 teaspoon Vanilla
2 small drops of Peppermint Oil ( be careful, a little bit goes a long way)

Bring to boil margarine, milk, and cocoa.  Remove from heat.  Add powdered sugar, vanilla, and Peppermint Oil.  Beat well.


I topped my frosting with crushed candy canes and a candy cane Hershey's Kiss.


Monday, December 13, 2010

You Take The Cake!


Last Night I had a Primary Board Meeting.  I really wanted to thank all of the teachers for their many hours of selfless service.  So the theme of the meeting was "You Take The Cake".  Pictured below is the invitation to the meeting.


For refreshments, we had cupcakes.  My good friend Karrie made some delicious Pumpkin Spice Cupcakes and also some White Cupcakes with a Raspberry Filling.

I made Chocolate Cupcakes with a Cream Cheese Candy Cane Filling.


And I also made Coconut Lime Cupcakes.


I practiced making the coconut lime cupcakes until I got them just right.  
In fact, I think they were PERFECT!  
This is what I did....

COCONUT LIME CUPCAKES
1 Duncan Hines Yellow Cake Mix
3 Large Eggs
1/3 Cup Vegetable Oil
1 Cup Coconut Milk
1/3 Cup Lime Juice
1 Tablespoon Lime Zest
1 Cup Shredded Coconut

Mix all ingredients together in a large bowl at low speed until moistened (about 30 seconds).
Then beat at medium speed for 2 minutes.  Fill cupcake liners about 2/3 full.  Bake at 350 degrees for 18-21 minutes, or until toothpick comes out clean.

LIME BUTTER CREAM FROSTING
1/2 Cup Butter
1/2 Cup Shortening
3 Cups Confectioner's Sugar
1 teaspoon Lime Juice
1 teaspoon vanilla
1 teaspoon Lime Zest
Flaked Coconut for decorating

Beat the butter and shortening until smooth, then add sugar and beat.  Add lime juice, vanilla, and lime zest and beat until fluffy.  Spread the frosting on cooled cupcakes and top with shredded coconut (I toasted mine).


The board meeting went well, the cupcakes were even better.  I hope you give these delicious treats a try!

Friday, November 19, 2010

Today I Am Thankful For......

Many Things!
But here are a few of the most important:

1.   My Savior, Jesus Christ.
2.   A LOVING husband who supports me in all that I do.
3.   The BEST children any Mom could ever ask for.
4.   Parents and In-laws who are GREAT examples to me.
5.   Six WONDERFUL siblings who I adore and look up to.
6.   AMAZING friends and neighbors.
7.   My little home.  It is CUTE and perfect for us.
8.   GOOD health.
9.   A baby who sleeps through the night.
10. The many opportunities that I have to serve others.

And the list goes on and on.

When I was growing up, my Dad often made my favorite dessert....Brownie Pudding Cake (which I will post a recipe for later).  But, the other day I was looking through one of my cookbooks, and I found a recipe for an Apple Pudding Cake.  You can't go wrong with pudding cake, right?  If Brownie Pudding Cake is good, then Apple Pudding Cake must be equally as good.  Well, we have an abundance of apples right now, so I decided to give this recipe a try.  It was simple to make, and my house smelled AMAZING while it was baking.  I kept telling the kids that I hoped it tasted as good as it smelled, and it did.  It was so delicious!  The cake was super moist, and the hot apples on top just made it WONDERFUL!  You are going to have to give this recipe a try.


APPLE PUDDING CAKE
This recipe may need to be doubled if you are using a 9 by 13 -inch pan.

Cake:                                                                            
1/4 cup shortening or oil                                               
1 egg                                                                               
1/2 cup milk or apple juice                                                         
1 cup white sugar                                                           
1 teaspoon vanilla                                                          
1 cup sifted flour
1 teaspoon baking powder
1/4 teaspoon salt

Filling:
1 bottle sliced apples (I just boiled fresh apples)
2 Tablespoons tapioca or cornstarch
              (or apple pie filling)
sugar
cinnamon

In a bowl, cream together sugar, shortening, egg, milk or juice from apples, and vanilla.  Mix together dry ingredients and add to mixture.  Set aside.

In a saucepan, drain remaining juice from apples.  Mix a small amount of liquid into cornstarch or tapioca.  Mix tapioca according to package directions.  Cook and stir over medium heat until mixture thickens.  Add apples into thickened sauce and heat.  Pour apples or apple filling into a baking dish.

Drop cake batter by tablespoon on top of apples.  (The best way to do this is to have two tablespoons - 1 to scoop batter and another to scrape the batter off the spoon.)  Spread the dollops of batter carefully so all the apples are covered with cake batter.  Sprinkle with sugar and cinnamon.  Bake at 350 degrees for 30 minutes or until cake tests done.  (I doubled the recipe and it took closer to 45 minutes to bake)  Serve warm with ice cream or whipping cream on top.



Friday, November 12, 2010

Turkeys....Turkeys....Turkeys....

Chocolate Chip Cookie Turkeys


First, Start with your favorite chocolate chip cookies.
(I suppose sugar cookies would also work)


 Take a cookie, and frost it with chocolate frosting.
(I used frosting from a can so this would be quick and easy)


Stick 8-10 sliced almonds in the frosting at the top.


Place two white chocolate chips on for eyes.


Place a mini chocolate chip in the center of each white chocolate chip.
(It helps to dip it in frosting first)


Place a candy corn front and center for the beak.


Break the center from a twisted pretzel for the feet.


So easy a child, caveman, or turkey could do it!