Wednesday, August 5, 2009

Chocolatey, Chocolate Chip Zucchini Cupcakes

It’s been a while since I last posted anything here. And really, I have no excuse except that I’m trying to lose weight. Sometimes I wonder why I didn’t start a Fitness blog! Maybe that’s to come. Anyway, we have a great abundance of Zucchini this year, so I’ve been on a quest to find ways to get my kids to eat it. To be totally honest, I didn’t like zucchini when I was young either. But now I really quite enjoy it. I made a casserole the other night and loaded it with zucchini, and the kids gobbled it up. They LOVED it!
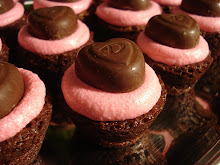
Well, today I got creative with the Zucchini again. This time around I decided to try some Chocolatey, Chocolate Chip Zucchini Cupcakes. They turned out Really good. And they taste so DELICIOUS!
For those of you who also have a great abundance of Zucchini, here is the recipe for you to try.

Chocolate, Chocolate Chip Zucchini Cupcakes

Ingredients:


1-1/4 cups butter, softened

1-1/2 cups sugar
2 eggs
1 teaspoon vanilla extract
2-1/2 cups all-purpose flour
3/4 cup baking cocoa
1 teaspoon baking powder
1 teaspoon baking soda
1/2 teaspoon salt
1/2 cup plain yogurt
1 cup grated zucchini
1 cup grated carrots (I just substituted another cup of zucchini)
Chocolate Chips


1 Directions:

In a large bowl, cream butter and sugar until light and fluffy. Add eggs, one at a time, beating well after each addition. Stir in vanilla. Combine the flour, baking cocoa, baking powder, baking soda and salt; add to the creamed mixture alternately with yogurt, beating well after each addition. Fold in zucchini, carrots, and chocolate chips.

Fill paper-lined muffin cups two-thirds full. Bake at 350° for 18-22 minutes or until a toothpick comes out clean. Cool for 10 minutes before removing from pans to wire racks to cool completely. Frost cupcakes. Yield: 21 cupcakes.


I frosted my cupcakes with a chocolate fudge frosting that I like to make. Here is that recipe....

Chocolate Fudge Frosting
1 stick butter
6 tablespoons milk
4 tablespoons cocoa
3 cups powdered sugar
1 teaspoon vanilla

Bring to boil butter, milk, and cocoa. Add powdered sugar and vanilla. Beat well and spread on warm cupcakes.


Next I grated a little chocolate to top it off. I hope you give these a try, and enjoy them as much as we did!

Tuesday, July 7, 2009

Cake Pops Without The Sticks? Part 2

1 Boxed Spice Cake + A Spoonful of Cream Cheese Frosting + A Spoonful of Coconut Pecan Frosting + Vanilla Candy Melts = The most delicious, mouth-watering treat you could EVER eat!

I know, I know..... You're thinking, "Didn't she already post about the 4th of July Cake Pops?" Well, I did. But, I made more! And these little gems were to die for.

First of all, bake a spice cake. You can use any recipe you would like. I just used a boxed cake mix due to lack of time. Follow the directions on the box to make your cake.

Once the cake is baked, crumble it into a large bowl. Stir in a spoonful of cream cheese frosting, and a spoonul of Coconut Pecan Frosting ( Again, I used the little store-bought tubs of frosting all for the sake of time.) Mix it well. I like to use my hands to make sure it gets well mixed.

Roll it into balls, and dip them into your melted candymelts. Easy as Pie!

Friday, July 3, 2009

Cake Pops Without The Sticks? Incredible!!!

I thought these little treats would be fun to take to my party on the 4th of July. They may not look real pretty, but BOY ARE THEY DELICIOUS! And easy to make, too. Chocolate cake with a hard chocolate mint shell....mmmmm.

Start by making your favorite kind of cake (in this case, I just used a boxed chocolate cake mix). Just follow the directions on the box and bake it. After it cools, crumble it up into a bowl. Stir in some frosting so that the cake crumbs will form into balls. One cake made about 55 (quarter-sized) balls.

Now here's the fun part. After I had all the balls rolled and onto a cookie sheet, I started to melt my candy melts. I bought my chocolate mint candy melts at Hobby Lobby. You can also buy them at Michael's or Gygi's or anywhere else that sells candy making supplies.

To melt the candy melts, just put them in a dish in the microwave. Stir them every 30 seconds until they are melted and smooth. Then send the little cake balls for a swim. I dipped them and put them on waxed paper until they hardened. Oh, and I added a few stars for fun.

For detailed instructions on how to make Cake Pops with the sucker sticks, check out www.bakerella.com . She has some really cute 4th of July cake pops on there.

Have a great 4th of July everyone!!!

Friday, June 26, 2009

Stephanie’s Whimsical Wedding Cake


This cake had whimsical written all over it when Stephanie brought me a drawing of how she wanted it to look. She is such an artist. Swirls, stripes, and daisies adorned this beautiful Tiffany blue and coral pink cake. The bottom tier was a white cake with raspberry filling, and the middle and top tiers were both chocolate cake with a chocolate butter cream filling. The cake got it’s shine from an edible white luster dust, which I painted on each layer. I made the daisies out of fondant a few days prior to the wedding. Be sure to click on the picture below to see all the great details.

I am really pleased with how this cake turned out. Thanks Stephanie, for letting me create your vision!

Tuesday, June 16, 2009

Apple Tart.....Another Paula Deen Favorite


Hey ya'all! I am really starting to enjoy making Paula Deen recipes, because they always turn out so yummy. My family quite enjoys me making them as well. And if you're lucky, maybe you can stop by when I happen to make one. DELICIOUS! I've also learned that a good Paula Deen dessert in my kitchen is great bribery to get my kids to eat their dinner (yes, even broccoli). The sour cream adds a unique, yet delicious flavor. I also changed it up a little by sprinkling a little cinnamon on top. So give this one a try....I'm sure you'll love it. Let me know how it turns out!

Paula Deen's Apple Tart
Ingredients:
Crust:
1 1/4 cups all-purpose flour
1/2 cup (1 stick) butter, room temperature
2 tablespoons sour cream

Filling:
About 6 medium apples, peeled, pitted, and sliced
3 large egg yolks
3/4 cup sour cream
3/4 cup sugar
1/4 cup all-purpose flour

Glaze:
1/2 cup apricot preserves or jelly
1 tablespoon frozen orange juice concentrate
Mint, for garnish
Whipped topping, for garnish

Directions:
Preheat the oven to 375 degrees F.

To make the crust:
Place the flour, butter, and sour cream in a food processor and pulse to combine. When the dough has formed a ball, pat with lightly floured hands into the bottom and sides of an ungreased 10-inch tart pan with a removable bottom and 1/2-inch sides, or a round au gratin dish. Bake for about 18 minutes, until the crust is set but not browned. Let cool while preparing the filling.

Lower the oven temperature to 350 degrees F.

To make the filling:
Peel and thickly slice the apples. Arrange the apple slices in overlapping circles on top of the crust, until it's completely covered. Overfill the crust, as apples will shrink during cooking.

Combine the egg yolks, sour cream, sugar, and flour and beat until smooth. Pour the mixture over the apples. Place the tart pan on a baking sheet and bake for about 1 hour, until the custard sets and is pale golden in color. Cover with an aluminum foil tent if the crust gets too dark. Transfer the tart pan to a wire rack to cool. When cool, remove the side wall of the pan.

To make the glaze:
Combine the preserves or jelly and orange juice. Spread with a pastry brush over the top of the warm tart. Serve the tart warm, at room temperature or chilled. Garnish with fresh mint.


We ate our tart with ice cream on top. It made it extra good! I bet it would also be great with whipping cream. Now I'm off to start a wedding cake. I'll be posting that next, so stay tuned!

Tuesday, June 9, 2009

Strawberry Rhubarb Pastry

My dear husband came in from the farm the other day with this......

and these.....
which inspired a strawberry rhubarb pastry. His favorite dessert.

I cannot take credit for this, because the only thing that I did to help with it was eat it. But I will share the recipe so that you, too, can make this super yummy dessert.

Strawberry Rhubarb Pastry
First of all, take 1 1/2 cups of flour
1/2 cup of sugar
2 eggs
and 1/2 cup butter or margarine.

Cut in the butter and mix it all together. Press in the bottom of a 9X13 pan.

Next, prepare the rhubarb and strawberries by rinsing and cutting them.

Stir together the rhubarb, strawberries, (about 1 quart)
and 1 (3 ounce) box of strawberry or raspberry Jello, and put on top of the crust.
Then you will make a crumb topping by mixing 1 cup of flour and 1 cup of sugar and cutting in 1/4 cup of butter. Sprinkle on top.
Bake at 350 degrees for about an hour, or until it starts to get bubbly in the middle.

Then serve it up warm! It is especially good with vanilla ice cream on top. Yum!


Sunday, May 31, 2009

I Made Lemon Blossoms Y'all!


For any of you who don't know......I'M A HUGE PAULA DEEN FAN! Well, I was talking with my friend Sara the other day, and she said that she had a Paula recipe that she wanted to try. Of course I had to try it as well. These Lemon Blossoms are AMAZINGLY delicious, and easy to make. I decided to make some to take to a family party today. It turns out...I'm not the only one who thought they were AMAZINGLY delicious! Everybody loved them.


Here is the recipe, so that each of you can make and try these wonderful delicacies.

PAULA DEEN'S LEMON BLOSSOMS

1 (18.25 oz. box) yellow cake mix
1 (3.4 oz.) instant lemon flavored pudding mix (I used the cook and serve because that's what I had on hand)
4 large eggs
3/4 cup plus 3 tablespoons vegetable oil, divided
4 cups confectioners' sugar
1 tablespoon lemon zest (about 1 lemon)
1/3 cup fresh lemon juice
3 tablespoons water

Preheat oven to 350 degrees. Spray miniature muffin pans with nonstick cooking spray (I like to use the cooking spray that has flour in it. I've never had a cake or muffin stick yet). In a large bowl, combine cake mix, pudding mix, eggs, and 3/4 cup oil. Beat for 2 minutes. Spoon 1 tablespoon of the batter (I use the small Pampered Chef scoop) into each muffin tin, and bake for 12 minutes. Turn the cakes onto a cloth towel.

In a medium bowl, sift confectioners' sugar. Add lemon zest, lemon juice, remaining 3 tablespoons oil, and water, stirring until smooth. Dip the cakes into the glaze while they are still warm, covering as much of the cake as possible. Place the cakes on a wire rack with wax paper underneath to catch the drips. Let the glaze set thoroughly before storing in an airtight container.

AMAZINGLY DELICIOUS!

Wednesday, May 27, 2009

An Adorable Cupcake Pin Cushion....Up for grabs!

Isn't this the most adorable and yummy looking pin cushion you have ever seen?  I know it's not edible....but it's a CUPCAKE!  One of my good friends  started a blog called Whimsy by Victoria.

Victoria is really talented at decorating and making adorable handbags, aprons, pin cushions, and more.  She also gives a lot of home decorating tips on a budget.  Well, if you check out her blog she is giving away one of these cute pin cushions.  All you have to do is go to her blog and comment on her post to be entered.  She is also giving away this adorable bag.  It is her Whimsy Signature bag.  So, check out her blog, and if you like it become a follower.  She would be happy to see you there.    http://whimsybyvictoria.blogspot.com/


Her giveaway ends on June 3rd, so be sure to visit soon.  I hope you win!

Friday, May 22, 2009

Erin's Birthday Surprise!


Erin's really good friend threw her a surprise birthday party tonight. It was so much fun! The best part was that she didn't even have a clue that it was going to happen. She was really surprised.

Her friend organized the entire thing, and asked me if I would make the cake. She said she had a poem that she wanted me to make the cake around. So, you have to read the poem for this cake to make sense.


Erin was just 8 years old
She wanted to be 9.
Her friend held a birthday party so we'd know
Her birthday had arrived.

Her mother made a birthday cake
Decorated fine,
A park, a stream, a dog, a girl
All having a great time.

Then your mother put a number on
To show the birthday year.

Oh, no! In icing pink and sweet
It says you're 8, not 9!

So now you must be 8 again
Until next May, and so
Just go to sleep and do not eat
Because you must not grow.

When Erin's birthday comes again
In the year 2010
Should she turn 9 at last, or skip ahead,
Should she be 10 then?

Tuesday, May 19, 2009

Cody's Soccer Ball Cake

I made this Soccer Ball Cake for a good friend of mine who was celebrating her son's birthday. The bottom is a white sheet cake with a raspberry filling. The green frosting was piped on to look like grass (It looked pretty cool). I made the fudge marble soccer ball using the Wilton 3D sports ball pan. I attached the ball to the sheet cake with a dowel so that it wouldn't roll away. This was ONE COOL CAKE! Be sure to click on the picture to see the details.

Friday, May 15, 2009

Rachel's Daisy Wedding Cake


Here is the cake that I've been working on this week. 3 Tiers of white cake with raspberry filling. I made the daisies out of fondant. This cake was a lot of fun to make!

Sunday, May 3, 2009

French Vanilla Cake With Raspberry Filling


Yesterday I got bored and decided to practice basket weaving on a cake. I still need a little more practice, but it was a lot of fun to make. The cake was delicious too! Click here to get instructions on how to basket weave your own cake.

Saturday, April 18, 2009

S'MORE BROWNIES ANYONE?

I had so many of my readers tell me that they made and really enjoyed the Chocolate Chip Cookie Brownies that I posted. So I decided to add S’more Brownies for everyone to look at, drool over, and to try.

One of my favorite things to do in the summertime is go camping. Well, not really. But I do enjoy the s’mores that usually go along with all of our camping trips. Since it is not quite warm enough to do the camping thing yet, I decided to make brownies with a s’more twist. I think you will really enjoy them. We sure did! I asked each of my children (my little bakers in training) to tell me how they would describe these brownies after they took the first bite…….

Erin said, “Delicious, gooey, and better than good!”

Ryan said, “Yummy and gooey. They really do taste like S’mores!”

Ashley said, “I like them, but they are so gooey Mom. They are yummy in my tummy.”

Adam said, “More…more….more…..”

So that about sums them up. They were simple to make. A bag of marshmallows, a boxed brownie mix, some graham crackers, a little butter, and some sugar is all it took to make these delicious wonders.

I started by making a graham cracker crust. I crushed about 16 graham crackers, and mixed them with ½ cup of butter, and ¼ cup of sugar. I pressed it into a 9X13 inch pan and let it bake for about 7 minutes. Next, I mixed up the brownie mix (according to the directions on the package), and poured it on top of the graham cracker crust. Then I baked it according to the package directions as well.


After the brownies cooled, I stacked large marshmallows over the entire top and stuck them under the broiler just long enough to toast them. Mmmmm…… It even smelled like the toasted marshmallows from camping.


I really loved them, but when I make them again, I think I will cut the marshmallows in half or use mini marshmallows instead. That might reduce some of the gooey-ness. But if you like gooey-ness, you will love the large marshmallows! I hope you try them out. Let me know what you think.

Tuesday, April 7, 2009

Thank You Bakerella!!!

Bakerella is famous for her Cake Pops. She makes really cute pops for all of the holidays, and this time around I couldn’t resist trying them! My friend Sara and I spent an entire day decorating our cute little creations (some of which are pictured above).

We started by baking cakes from a cake mix. After the cakes baked and cooled, we crumbled them into a bowl and mixed them with frosting. Next, we rolled them into balls (about the size of a quarter). The balls needed to go in the freezer for a few minutes while we melted our candy melts. It was necessary to dip the lollipop sticks into the chocolate melts before putting them into the balls. This made it so the balls wouldn’t fall off the sticks. Once the balls were all on sticks, we placed them into foam blocks and put them back into the freezer. After a few minutes we were able to dip the cake pops into candy melts and decorate away. It’s amazing what you can do with cake sprinkles and confetti! For more details on how to make Bakerella’s Famous Cake Pops check out her website at http://bakerella.blogspot.com/2008/08/hope-these-put-smile-on-your-face.html


Saturday, March 21, 2009

Cake and Cookie Decorating Birthday Party

I got asked to teach cake decorating at a birthday party last night!  I was totally in my element, not only with the cake decorating, but I love to hang out with the young girls. They are always so much fun to be around.  I guess it makes me feel young again.  My daughter was invited to this party and came home saying it was one of the best parties she had ever been to, so that was great to hear.  I think everyone had a good time.  I know I did.

At the beginning of the party, each girl got to paint a pot in bright Spring colors (since it was the first day of spring).  They got pretty creative, and the pots were all very cute and unique.  It was fun to see their personalities come out while painting.


While the adorable pots were drying, the girls were given aprons to decorate.  All cake decorators need a good apron!


The girls even posed for a picture sporting their new aprons.


Next, I showed them a few cake decorating techniques using a delicious buttercream frosting, and various tips.  I taught them a lot of the basics.


I had sugar cookies on sticks for them to decorate.  They all did an AWESOME job.  It was fun to see how different all of the cookies were.  There sure was a lot of giggling going on.


The end result was phenomenal!  The cookie bouquets turned out really well, and everyone had a great time.


Sunday, March 15, 2009

Banana Split Cake

Last weekend I took a trip to Denver to spend some time with my sister. We always have so much fun together. One of the things that we like to do when we get together is shop. So, we went to a couple hobby and home décor stores, and I came across a set of mini cake pans that I couldn’t pass up. I know, I know….I’m starting to wonder why I get so excited about such things. But I HAD to have this set. It is the Wilton Tasty-Fill Mini Cake Pan Set.

The set has 4 mini pans, and a recipe booklet. I immediately went to the recipe book to see what I could make, and this is what I came up with…….


A DELICIOUS BANANA SPLIT CAKE!!! Now if I have you drooling over your computer screen, keep in mind that you (YES YOU!) can also make this cake. I will tell you step by step how to make it.

I started out with a basic banana cake recipe:

½ Cup Butter (softened)

1 Cup Sugar

1 egg

½ Cup Butter Milk

1 Cup Mashed Bananas

1 t. Soda

2 Cups Flour

¼ t. Salt

**Cream sugar, egg, and butter. Add bananas and soda. Add balance of ingredients. Mix well. Next put ½ cup of batter into each mini cake pan. Bake at 350 degrees for 20-25 minutes. Let cool before taking cakes out of pans.

Wrap the cakes in plastic wrap and put them in the freezer for a couple hours. Then pull them out to put the filling in, which is softened strawberry ice cream. Mmmmm….. After filling with strawberry ice cream, stack 2 cakes together (so the filling is inside). Return them to the freezer so the ice cream can set back up. Just before you are ready to serve these delicious little delicacies, pull them out of the freezer and frost with whipping cream. The only thing that could make this any better would be chocolate, but….. You are in luck! You pour ice cream toppings on top of the whipping cream. On this particular cake I used chocolate, strawberry, and caramel toppings. I also chopped up some peanuts, and topped it off with a cute little cherry. DELICIOUS!!!


Now, if you would like to give this cake a try, you can click on the link over to the left of my blog to purchase these fun pans. I imagine I will be using mine a lot!


Monday, March 2, 2009

Raspberry Lemon Gem Cookies

DON'T THESE LOOK DELICIOUS?

Most of us have made cookies before using a cake mix. Well, that's what I did this time around, but I put my own twist on things. I have always liked lemon cakes with raspberry filling, so I thought I would try a lemon COOKIE with a raspberry filling. I started with a lemon cake mix. Next I added 2 eggs, 2 Tablespoons Canola Oil, 2 Tablespoons water, and a teaspoon of Vanilla Flavoring. After mixing all the ingredients together, I dropped the dough by the teaspoonful on a lightly greased cookie sheet. I made a well in the center of each cookie, which I did by pressing in a greased melon baller. I'm sure there are other ways to do it. Then I put seedless raspberry preserves in the center of each one.


I baked them at 350 degrees for about 10 minutes. After they cooled completely, I melted white chocolate and drizzled it on top of the cookies. What an AWESOME finish to an AWESOME cookie! These cookies were a perfect Family Home Evening treat. Definitely give them a try, and let me know what you think. MMMMMM......

Friday, February 27, 2009

FuN FuN FuN


The first 3 people to respond to this post will get something made by me!
My choice.
For you.
This offer does have some restrictions and limitations:
1- I make no guarantees that you will like what I make!
2- What I create will be just for you.
3- It'll be done this year.
4- You have no clue what it's going to be.
5- I reserve the right to do something extremely strange.
The catch is that you must repost this on your blog and offer the same to the first 3 people who do the same on your blog.
The first 3 people to do so and leave a comment telling me they did win a
FAB-U-LOUS homemade gift by me!
Oh, and be sure to post a picture of what you win when you get it! Who's in?

Thursday, February 26, 2009

Fruit Pizza...A Perfect Spring Dessert

This is one of those desserts that I absolutely love, but have never made before. As I was grocery shopping the other day, I came across a display of blueberries and strawberries on sale. I couldn't pass up a good deal on such delicacies. So, thus came the FRUIT PIZZA!


This was such an easy treat to make. A simple sugar cookie dough created the base. And it was topped with a cream cheese frosting. After a little slicing, I loaded all the fruit on. Mmmm......


I will definitely be earning "Brownie Points" (or should I say "Pizza Points") with the family tonight.

Tuesday, February 17, 2009

Delicious Chocolate Chip Cookie Brownies

I found a blog that I really enjoy reading on a regular basis. It is www.bakerella.blogspot.com. On her blog, Bakerella offers a lot of cute, fun, and delicious recipe ideas for others to try. I saw this recipe and had to give it a try.


You simply make your favorite brownie recipe, and your favorite chocolate chip cookie recipe. Take big spoonfuls of the cookie dough and press it into the brownie batter. Looking good, right? Oh, it gets even better.


After they bake, you need to let them cool completely. Then pour on some chocolate ganache. (I will include my chocolate ganache recipe at the bottom of this post)


You need to allow the chocolate ganache some time to set up before you cut into it. I know, you need a lot of patience! But it is all worth it in the end. Mmmmmm.......


Don't they look AWESOME? They were fun to make, and they taste great too.

Chocolate Ganache Recipe
8 oz. Semi Sweet Chocolate (I used semi sweet chocolate chips)
3/4 Cup Heavy whipping cream
2 Tablespoons Butter
1/2 t. vanilla (optional)

Bring the whipping cream and butter to a boil over medium heat. Pour over the chocolate in a bowl. Cover and let sit for 5 minutes. Whisk until blended and creamy. Pour over your brownies, or whatever dessert you are making. Let it set up and you are good to go. This recipe can also be used to make chocolate truffles.