Showing posts with label Cakes. Show all posts

Wednesday, August 6, 2014

My First Naked Cake With Chocolate Dipped Strawberries!

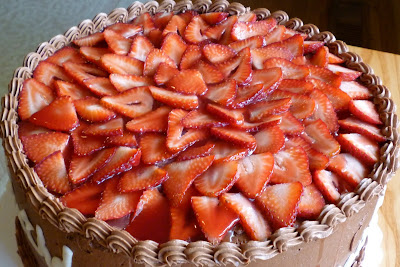
This cake turned out so much better than I ever envisioned!  It is filled with a delicious strawberry butter cream filling, and a chocolate fudge butter cream filling.  The hit of this cake is definitely the chocolate dipped strawberries that cascade down the front.  This cake tastes every bit as good as it looks!


 Congratulations to Mitch and Heidi on your very special day!  I'm so glad that I got to be a part of it.


Monday, May 12, 2014

Walter Mitty Clementine Cake

I found the recipe to this Walter Mitty Clementine Cake on a blog by Cathy Merenda.  In her post she talks about how one of the through-lines in the film (Walter Mitty) is this cake.    At the beginning of the story, Walter’s sister Odessa delivers him one on his birthday.  It's his favorite cake made by his mother (the wonderful Shirley McLane).   

I really like this cake because it is gluten free!  It is flourless and has whole clementines in it.  I also found it super easy to make!


Here is the recipe from Cathy:

CLEMENTINE CAKE
  • 375 grams clementines (approximately 5 small)
  • 6 eggs
  • 1 1/4 cup (225 grams) white sugar
  • 2 1/4 cups (250 grams) ground almonds
  • 1 teaspoon baking powder
  1. Preheat the oven to 375ºF.  Butter and line an 8 or 9 inch springform pan with parchment.
  2. Poke each clementine 3 or 4 times with a knife.   Put the clementines in a bowl with a microwave safe cover or plastic wrap.  Cook on high for 3-4 minutes. Cool slightly then dump the clementines (whole) in a food processor and process until smooth.
  3. In large bowl beat eggs and sugar until light colored and doubled in volume (about 5 minutes)
  4. Add in chopped clementines and mix well.  Then add ground almonds and baking power and mix until combined.
  5. Pour mixture into pan and bake for about 45 minutes (when a skewer will come out clean).
  6. Cool in the pan on a rack.   Once cake is cold, remove from pan and pull off any parchment.
  7. Glaze and add candied clementines to decorate.
GLAZE
  • 2 cups confectioners sugar
  • 3 tablespoons softened butter
  • 1/2 cup clementine juice
  1. Mix everything in a bowl adjusting clementine juice and sugar to make a loose but thick glaze
CANDIED CLEMENTINES
  • 3 clementines
  • 2 cups sugar
  • 1 cup water
    1. Slice clementines very thinly.
    2. Put sugar and water in a heavy bottomed pan on medium heat.   Stir until sugar is dissolved.
    3. Add clementine slices and simmer on low for about 15-20 minutes.
    4. Pull clementines from sugar mixture and place on parchment or silpat until cool.
You can also visit her blog to get her story on the cake.  Click here.

Thursday, August 2, 2012

"Hey, Where's Perry???"

What do you get a 5-year old who loves Phineas and Ferb?  My little Adam turned 5 yesterday, so we decided (at the last minute) to throw him a "Where's Perry" birthday party.

He was thrilled to get some new PEZ dispensers!

He also got the Perry Files...

And, he got many other gifts that he absolutely LOVES!  In fact, he woke me up about 3 times in the night asking when it was going to be morning so he could play with his birthday presents.

His 12-year old sister made him an ADORABLE banner!  I knew if anybody could pull off a cute "Perry" poster, Erin could do it.

We also made him a "Perry The Platypus" Cake!
The base cake was a 14-inch round chocolate cake with a chocolate fudge frosting.  Perry was also made out of chocolate cake.  The cake was definitely the "hit" of the party!

Happy Birthday little buddy!  We can't believe that you are already 5 years old.  We love you so much!!!
Hey...... Where's Perry?

Friday, January 28, 2011

One Of My Favorite Blogs......

There is a blog that I love to follow, because it always has a lot of good and easy recipes.  I follow it by email, and look forward to each new post.  And it really is one of my favorites.  She is right up there with Pioneer Woman and Bakerella.  Well, not too long ago, Tina at Mommy's Kitchen did a post on Sour Cream & Cherry Coffee Cake.  Her post and pictures were AMAZING........enough to make anyone want to try it.  Doesn't it sound heavenly?  I had to give it a try because not only did it look delicious, but it looked simple to make.  I like anything simple.  

It only takes a few ingredients....


Here is Tina's Recipe........

Sour Cream & Cherry Coffee Cake
1 - 18 oz package white cake mix (I used a yellow mix, because that is what I had on hand)
1 - 8 oz container sour cream
3 - eggs
1/4 - cup water
1 - can cherry pie filling
1/4 - cup sliced almonds, optional

Preheat oven to 350. Lightly grease a jelly-roll pan or 9 x 13 inch baking pan. Mix together the sour cream, eggs and water. Combine with the cake mix. Spread mixture into a greased baking dish and drop the pie filling over the batter in spoonfuls.

Make sure to swirl the pie filling throughout the batter. If not the pie filling will settle in the middle.Bake for 30-40 minutes or until lightly browned and cooked through. Test with toothpick for doneness. Cool in pan and drizzle with a simple icing if desired.


Simple Icing
1 ½ - cups powdered sugar
2 - tablespoons milk
½ - teaspoon vanilla or almond extract

Blend all the ingredients together until smooth. Drizzle over coffee cake and garnish with sliced almonds.


I went right to work making my own.

Here is my Sour Cream & Cherry Coffee Cake

I also made.......

Sour Cream & Apple Coffee Cake

and.......

Sour Cream & Blueberry Coffee Cake

I was so excited that I could substitute the cherry pie filling for other flavors.  They were all so delicious, but my very favorite was the apple.  You will have to give them a try and let me know what your favorite is.

Friday, November 19, 2010

Today I Am Thankful For......

Many Things!
But here are a few of the most important:

1.   My Savior, Jesus Christ.
2.   A LOVING husband who supports me in all that I do.
3.   The BEST children any Mom could ever ask for.
4.   Parents and In-laws who are GREAT examples to me.
5.   Six WONDERFUL siblings who I adore and look up to.
6.   AMAZING friends and neighbors.
7.   My little home.  It is CUTE and perfect for us.
8.   GOOD health.
9.   A baby who sleeps through the night.
10. The many opportunities that I have to serve others.

And the list goes on and on.

When I was growing up, my Dad often made my favorite dessert....Brownie Pudding Cake (which I will post a recipe for later).  But, the other day I was looking through one of my cookbooks, and I found a recipe for an Apple Pudding Cake.  You can't go wrong with pudding cake, right?  If Brownie Pudding Cake is good, then Apple Pudding Cake must be equally as good.  Well, we have an abundance of apples right now, so I decided to give this recipe a try.  It was simple to make, and my house smelled AMAZING while it was baking.  I kept telling the kids that I hoped it tasted as good as it smelled, and it did.  It was so delicious!  The cake was super moist, and the hot apples on top just made it WONDERFUL!  You are going to have to give this recipe a try.


APPLE PUDDING CAKE
This recipe may need to be doubled if you are using a 9 by 13 -inch pan.

Cake:                                                                            
1/4 cup shortening or oil                                               
1 egg                                                                               
1/2 cup milk or apple juice                                                         
1 cup white sugar                                                           
1 teaspoon vanilla                                                          
1 cup sifted flour
1 teaspoon baking powder
1/4 teaspoon salt

Filling:
1 bottle sliced apples (I just boiled fresh apples)
2 Tablespoons tapioca or cornstarch
              (or apple pie filling)
sugar
cinnamon

In a bowl, cream together sugar, shortening, egg, milk or juice from apples, and vanilla.  Mix together dry ingredients and add to mixture.  Set aside.

In a saucepan, drain remaining juice from apples.  Mix a small amount of liquid into cornstarch or tapioca.  Mix tapioca according to package directions.  Cook and stir over medium heat until mixture thickens.  Add apples into thickened sauce and heat.  Pour apples or apple filling into a baking dish.

Drop cake batter by tablespoon on top of apples.  (The best way to do this is to have two tablespoons - 1 to scoop batter and another to scrape the batter off the spoon.)  Spread the dollops of batter carefully so all the apples are covered with cake batter.  Sprinkle with sugar and cinnamon.  Bake at 350 degrees for 30 minutes or until cake tests done.  (I doubled the recipe and it took closer to 45 minutes to bake)  Serve warm with ice cream or whipping cream on top.


Thursday, September 16, 2010

My New Love......Paula Deen's Ooey Gooey Butter Cake


While I was shopping at Walmart one day, I came across the yummiest lemon cake in the bakery.  After trying this delicacy, I decided that I should find a recipe for it.  After all, I couldn't keep spending $3.00 for a little slice of cake.  The package said that it was Paula Deen's Ooey Gooey Lemon Butter Cake.  Surely I could find a Paula Deen recipe online.

And I did!  I really love Google.  With the click of my mouse, I was able to find a ton of sites with this recipe.  And what's even better........The recipe comes with many variations.  I plan on trying the pumpkin variation next. It sounds perfect for fall.  Today I made the Lemon Butter Cake, because that is what I was craving.

Paula Deen's Ooey Gooey Butter Cake
Cake
1 (18.25 ounce) box yellow cake mix
1 egg
1/2 cup (1 stick) butter, melted

Filling
1 (8 ounce) package cream cheese, softened
2 eggs
1 teaspoon pure vanilla extract
1 (16 ounce) box confectioners' sugar
1/2 cup (1 stick) butter, melted

Preheat oven to 350 degrees.  Lightly grease a 13x9x2 inch baking pan.

In the bowl of an electric mixer, combine cake mix, egg, and butter and mix well.  Pat into the bottom of   prepared pan and set aside.

Still using an electric mixer, beat cream cheese until smooth; add eggs and vanilla.  Dump in confectioners' sugar and beat well.  Reduce speed of mixer and slowly pour in butter.  Mix well.

Pour filling onto cake mixture and spread evenly.  Bake for 40 - 50 minutes.  Don't be afraid to make a judgment call on the cooking time, because oven temperatures can vary.  You want the center to be a little gooey, so don't bake it past that point!

Remove from oven and allow to cool completely.  Cut into squares.  Just remember that these wonderful little cakes are very, very rich, and a little will go a long way.

Here are the different variations.....you can have fun and even create your very own version of this delicious dessert.


Pumpkin Gooey: Follow the original recipe, adding a 15-ounce can of pumpkin pie filling and an extra egg to the cream cheese filling. Bake as usual, remove from oven, and allow to cool. Cut into squares and top each square with a pecan half. Serve with a dollop of fresh whipped cream. I promise you'll never want pumpkin pie again!

Pineapple Gooey: Add a 20-ounce can of drained crushed pineapple and an extra egg to the cream cheese filling. Proceed as directed above.

Lemon Gooey: Use a lemon cake mix in place of the yellow cake. Add the juice (approximately 1/4 cup) and zest of 2 lemons to the cream cheese filling. Proceed: as directed above.

Carrot Cake Gooey: Use a spice cake mix, and add 1 cup chopped nuts and 1 1/2 cup finely grated carrots to the cream cheese filling. Proceed as directed above.

Peanut Butter Gooey: Use a chocolate cake mix. Add 1 cup creamy peanut butter and an extra egg to cream cheese filling. You can sprinkle the top of batter with 1 cup chopped peanuts if you like. Proceed as directed above.

Chocolate Chip Gooey: Use either yellow or chocolate cake mix. Sprinkle 1 cup chocolate chips and 1 cup chopped nuts on top of filling. Proceed as directed above.

Banana Gooey: Use a yellow cake mix. Prepare cream cheese filling as directed, beating in 2 ripe bananas and an extra egg. Proceed as directed above.

Nutty Gooey: Use a yellow cake mix, and add 1 cup chopped nuts to the cake mixture. Proceed as directed above.

Chippy Gooey: Stir 1 cup white chocolate chips, peanut butter chocolate chips, butterscotch morsels, Heath Almond Toffee Bits or Heath Milk Chocolate Toffee Bits into filling. Proceed as directed above.


Give this treat a try, and let me know what you think.  Also let me know if you have any other variations that I can add to my list!  These bar-like treats will not disappoint.

Sunday, June 6, 2010

A Decadent Chocolate Strawberry Cake For Berneitta!


Last night I had the opportunity to make a cake for some good friends of mine.  They were celebrating their Grandmother's birthday.  When I asked what flavor of cake they wanted, the response that I got was, "Whatever you think would be good".   Hmmmm......Well, I think almost all cakes are good.  I decided that I could NEVER go wrong with chocolate.  And who doesn't like strawberries?  That's when I decided to make this decadent Chocolate Strawberry Cake.  It is a moist 12 inch cake, stacked 3 layers high, and  it is filled with a rich chocolate butter cream frosting.  While I was frosting the cake, and washing and slicing the strawberries,  my cute husband was melting white chocolate to do the lettering on the sides.  We actually wrote the words out, and then formed them to the 12 inch pan so that they would bend with the cake.  I think they turned out great!  I also made a delicious strawberry glaze, which I drizzled on top of the strawberries.  I will have to share the recipe with you, because it really turned out great!  This glaze would also work as a filling for inside the cake.  


Strawberry Cake Filling/ Glaze

1 small box Strawberry flavored gelatin
1/2 cup hot water
1 (20 oz.) jar Strawberry jam  (I used the seedless kind)
1 cup water
1/2 cup cornstarch


Mix the gelatin with 1/2 cup hot water.  Stir until dissolved.  Add the jam.  Stir until well blended.  Combine cornstarch and 1 cup water.  Set aside.  Heat jam mixture to boiling.  Add cornstarch mixture.  Stir over heat until thickened.  Cool and use.

You can use any flavor of gelatin and jam.  (This is what I use for my raspberry cake filling, and it is great!)


This cake turned out great, and the family loved it!  I can't wait to make another one.

Tuesday, December 29, 2009

Meal or No Meal....

Many of you have seen or heard of the game show “Deal or No Deal”. Well, the other night, we attended a party where the theme was “Meal or No Meal”. Thanks to my creative sister-in-law and her family. Our game involved a contestant, a BAKER, and Howie Michael as the host.
Here is the famous baker!


Instead of having numbered briefcases to select, we had numbered pizza boxes. Inside each pizza box was a picture of a treat or goodie. The smallest prize was a single M&M, and the largest prize was a giant box of chocolates.


There were other prizes in between such as an oreo cookie, miniature candy bars, regular candy bars, and king size candy bars. Every so often, the BAKER would call on a cell phone to offer the contestant a goodie to quit the game. This offer was based roughly on the amounts of goodies remaining in play. At this point, the contestant would have to choose “Meal” (which would end the game), or “No Meal” (and they would have to choose another pizza box).


Yes, it really is a cake!

I thought it looked like a real briefcase. I guess I'm not the only one, because somebody tried to open it!

Thursday, December 17, 2009

One of my Passions Revealed

To all of my friends in cyber land. I am about to reveal one of my passions that I have this time of year. I have many of them, but this passion makes my mouth water and my taste buds dance. It is sweet and tasty. And people either love it or they hate it. It is something that I remember having every Christmas season since I was a small child. It is EGGNOG! I’ve been pretty good at avoiding it as I pass by the dairy section of the grocery store. But today I caved in and bought me some. Ok, to be honest, I bought a couple of cartons.

Now, I didn’t pour me a full glass and sit by the fire and enjoy a moment of heaven. Even though that sounds so nice. I made dinner and dessert with it. Oh, and it was good. Really, really good. My kids gobbled up every bite, and asked for seconds, and thirds, and fourths………ok, they just took seconds. But they liked it a lot. Dinner was Eggnog Pancakes! Have you ever heard of such a thing? Neither had I. But I made some and they were a sure hit. For some reason, eggnog pancakes and maple syrup go really well together. Here is the recipe for my Eggnog Pancakes. You should give them a try.

EGGNOG PANCAKES

1 1/4 cups all-purpose flour

1 egg

1 1/2 cups eggnog

1/4 cup granulated sugar

1 teaspoon baking powder

1 teaspoon baking soda

1/4 cup cooking oil

1 pinch salt

1/2 t. rum extract

1/2 t. nutmeg

Preheat a skillet over medium heat. Mix all of the ingredients until combined. Melt a little bit of butter in the pan. Pour the batter by spoonfuls into the hot pan, forming 5-inch circles. When the edges appear to harden, flip the pancakes over. They should be golden brown on both sides. Makes 8-10 pancakes. Enjoy!

For dessert I baked an Old Fashioned Eggnog Bundt Cake. It was very moist, delicious, and rich. I got this recipe from Tina over at Mommy’s Kitchen, who by the way, has an amazing site. But you’ve heard me say that before. She truly is the blogger of all things yummy. Here is a link to her site, so you can get the recipe. It was easy to make and took only a few ingredients. And, I got to use a bundt pan that I bought about 10 years ago that I have never used.

Here are the few ingredients. (Notice the big, beautiful, brown eggs. They came from my Rhode Island Red chicken. She just started laying about a month ago.)

I mixed them together.....
......and here is my first Bundt Cake.
An Eggnog Bundt Cake! And it was more delicious than I could ever describe. I will definitely be making this cake again. Especially now that I've conquered my fear of baking in a bundt pan. I hope you give this cake a try and enjoy it as much as I did.

Monday, November 2, 2009

Pumpkin Sheet Cake With Cream Cheese Frosting


We got to go to many parties this weekend for Halloween and Birthdays. We ended up taking a Pumpkin Sheet Cake to two of the parties. I really enjoy pumpkin cake, pumpkin cookies, and really anything that is made of pumpkin. But this pumpkin sheet cake is the MOST DELICIOUS pumpkin cake that I have ever eaten. It is super moist. For this reason I am going to share the recipe with you. I think EVERYONE needs to try it.

Like the Candy Corn Sugar Cookies that I made, this recipe also comes from Tina at Mommy's Kitchen. I really love her site, because she has a monthly menu and she posts recipes for all of her meals. They are easy, practical meals that anybody can make. And of course, she also has delicious desserts and treats. Stepping into her blog is like stepping into her kitchen. So thank you Tina, for having such an AMAZING site.

Pumpkin Sheet Cake With Cream Cheese Frosting

15 oz. can pumpkin (I used Banana Squash that I had baked)
2 cups sugar
1 cup vegetable oil
4 eggs, beaten
2 cups flour
2 tsp. baking soda
2 tsp. cinnamon
1/4 tsp. nutmeg
1/2 tsp. salt

In a mixing bowl, beat the pumpkin, sugar, and oil. Add eggs and mix well. Combine the dry ingredients and add to the pumpkin mixture, beating until well blended. Pour into a greased 10X15 inch baking pan.


Bake for 25-35 minutes at 350 degrees.

Cool the cake completely and then frost it with the cream cheese frosting. Here's what you'll need for the frosting:

Cream Cheese Frosting:

1 stick butter, softened (1/2 cup)
8 oz. cream cheese, softened
1 1/2 tsp. vanilla
2 1/4 cups powdered sugar
5-6 tsp. milk

Beat the butter and cream cheese together. Add the vanilla and blend till smooth. Gradually add the powdered sugar and mix well. Add the milk a bit at a time until you get it to a spreadable consistency. Spread on top of the sheet cake.

You can also top this cake with some chopped pecans or walnuts, but that is optional.

I hope you give this cake a try and enjoy it as much as we did. DELICIOUS!

Monday, September 14, 2009

A What? A Peach Upside Down Cake!

My Dad gave me some peaches the other day off of his tree. I didn't have quite enough to get a canning operation going, so I went on a quest to find a yummy peach dessert recipe. I came across a lot of peach pie recipes, and they all looked great. But when I found this recipe for a Peach Upside Down Cake, I just had to try it. It turned out AMAZING! It was almost like a peach cobbler, and was especially wonderful served warm with a scoop of ice cream.

Start by heating your oven to 325 degrees. Butter a 9-inch square or round cake pan, or spray with baking spray. Peel and pit the peaches, slice thinly.

Fruit Mixture:
3 peaches, peeled, thinly sliced, about 2 cups of slices (I think I used 4 or 5 peaches)
1/2 cup light brown sugar, packed
1 scant teaspoon ground cinnamon
3 Tablespoons melted butter

Toss the peaches with the brown sugar, 1 teaspoon of cinnamon, and 3 tablespoons of melted butter. Arrange the peach mixture in the prepared baking pan.
Cake:
1 3/4 cup all-purpose flour, stirred before measuring
1/4 teaspoon salt
2 teaspoons baking powder
1/2 teaspoon cinnamon
1/2 cup butter, room temperature
3/4 cup granulated sugar
2 large eggs
1/2 teaspoon vanilla extract
1/4 teaspoon almond extract
2/3 cup milk

Combine the flour, salt, baking powder, and 1 teaspoon cinnamon in a bowl. In a large mixing bowl with electric mixer, beat butter with the sugar until light and fluffy. Beat in eggs, vanilla extract, and almond flavoring. Add the flour mixture to the sugar mixture, alternating with the milk, beating just until blended. Spoon the batter over the peach slices.
Gently spread it around to cover the peaches.
Bake for 55 to 65 minutes, or until a toothpick inserted in the center of the cake comes out clean.
Invert the hot cake onto a platter or cake plate and let stand for about 5 minutes. Remove the pan and scrape up any fruit slices clinging to the pan and arrnage them over the cake.
Like I said before, it was especially wonderful served warm with a scoop of ice cream.

Friday, May 22, 2009

Erin's Birthday Surprise!


Erin's really good friend threw her a surprise birthday party tonight. It was so much fun! The best part was that she didn't even have a clue that it was going to happen. She was really surprised.

Her friend organized the entire thing, and asked me if I would make the cake. She said she had a poem that she wanted me to make the cake around. So, you have to read the poem for this cake to make sense.


Erin was just 8 years old
She wanted to be 9.
Her friend held a birthday party so we'd know
Her birthday had arrived.

Her mother made a birthday cake
Decorated fine,
A park, a stream, a dog, a girl
All having a great time.

Then your mother put a number on
To show the birthday year.

Oh, no! In icing pink and sweet
It says you're 8, not 9!

So now you must be 8 again
Until next May, and so
Just go to sleep and do not eat
Because you must not grow.

When Erin's birthday comes again
In the year 2010
Should she turn 9 at last, or skip ahead,
Should she be 10 then?

Tuesday, May 19, 2009

Cody's Soccer Ball Cake

I made this Soccer Ball Cake for a good friend of mine who was celebrating her son's birthday. The bottom is a white sheet cake with a raspberry filling. The green frosting was piped on to look like grass (It looked pretty cool). I made the fudge marble soccer ball using the Wilton 3D sports ball pan. I attached the ball to the sheet cake with a dowel so that it wouldn't roll away. This was ONE COOL CAKE! Be sure to click on the picture to see the details.

Sunday, May 3, 2009

French Vanilla Cake With Raspberry Filling


Yesterday I got bored and decided to practice basket weaving on a cake. I still need a little more practice, but it was a lot of fun to make. The cake was delicious too! Click here to get instructions on how to basket weave your own cake.