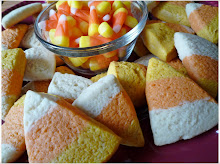
1 Boxed Spice Cake + A Spoonful of Cream Cheese Frosting + A Spoonful of Coconut Pecan Frosting + Vanilla Candy Melts = The most delicious, mouth-watering treat you could EVER eat!Tuesday, July 7, 2009
Cake Pops Without The Sticks? Part 2
1 Boxed Spice Cake + A Spoonful of Cream Cheese Frosting + A Spoonful of Coconut Pecan Frosting + Vanilla Candy Melts = The most delicious, mouth-watering treat you could EVER eat!Friday, July 3, 2009
Cake Pops Without The Sticks? Incredible!!!
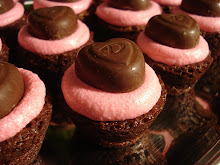
I thought these little treats would be fun to take to my party on the 4th of July. They may not look real pretty, but BOY ARE THEY DELICIOUS! And easy to make, too. Chocolate cake with a hard chocolate mint shell....mmmmm.Friday, June 26, 2009
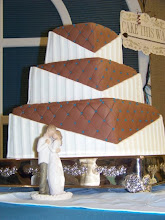
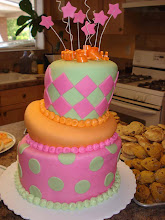
Stephanie’s Whimsical Wedding Cake

Tuesday, June 16, 2009
Apple Tart.....Another Paula Deen Favorite
Hey ya'all! I am really starting to enjoy making Paula Deen recipes, because they always turn out so yummy. My family quite enjoys me making them as well. And if you're lucky, maybe you can stop by when I happen to make one. DELICIOUS! I've also learned that a good Paula Deen dessert in my kitchen is great bribery to get my kids to eat their dinner (yes, even broccoli). The sour cream adds a unique, yet delicious flavor. I also changed it up a little by sprinkling a little cinnamon on top. So give this one a try....I'm sure you'll love it. Let me know how it turns out!
Tuesday, June 9, 2009
Strawberry Rhubarb Pastry


Sunday, May 31, 2009
I Made Lemon Blossoms Y'all!

Wednesday, May 27, 2009
An Adorable Cupcake Pin Cushion....Up for grabs!
Friday, May 22, 2009
Erin's Birthday Surprise!
Erin's really good friend threw her a surprise birthday party tonight. It was so much fun! The best part was that she didn't even have a clue that it was going to happen. She was really surprised.

Tuesday, May 19, 2009
Cody's Soccer Ball Cake
I made this Soccer Ball Cake for a good friend of mine who was celebrating her son's birthday. The bottom is a white sheet cake with a raspberry filling. The green frosting was piped on to look like grass (It looked pretty cool). I made the fudge marble soccer ball using the Wilton 3D sports ball pan. I attached the ball to the sheet cake with a dowel so that it wouldn't roll away. This was ONE COOL CAKE! Be sure to click on the picture to see the details.
Friday, May 15, 2009
Rachel's Daisy Wedding Cake
Sunday, May 3, 2009
French Vanilla Cake With Raspberry Filling
Yesterday I got bored and decided to practice basket weaving on a cake. I still need a little more practice, but it was a lot of fun to make. The cake was delicious too! Click here to get instructions on how to basket weave your own cake.
Saturday, April 18, 2009
S'MORE BROWNIES ANYONE?
I had so many of my readers tell me that they made and really enjoyed the Chocolate Chip Cookie Brownies that I posted. So I decided to add S’more Brownies for everyone to look at, drool over, and to try.

One of my favorite things to do in the summertime is go camping. Well, not really. But I do enjoy the s’mores that usually go along with all of our camping trips. Since it is not quite warm enough to do the camping thing yet, I decided to make brownies with a s’more twist. I think you will really enjoy them. We sure did! I asked each of my children (my little bakers in training) to tell me how they would describe these brownies after they took the first bite…….
Erin said, “Delicious, gooey, and better than good!”
Ryan said, “Yummy and gooey. They really do taste like S’mores!”
Ashley said, “I like them, but they are so gooey Mom. They are yummy in my tummy.”
Adam said, “More…more….more…..”
So that about sums them up. They were simple to make. A bag of marshmallows, a boxed brownie mix, some graham crackers, a little butter, and some sugar is all it took to make these delicious wonders.

I started by making a graham cracker crust. I crushed about 16 graham crackers, and mixed them with ½ cup of butter, and ¼ cup of sugar. I pressed it into a 9X13 inch pan and let it bake for about 7 minutes. Next, I mixed up the brownie mix (according to the directions on the package), and poured it on top of the graham cracker crust. Then I baked it according to the package directions as well.

After the brownies cooled, I stacked large marshmallows over the entire top and stuck them under the broiler just long enough to toast them. Mmmmm…… It even smelled like the toasted marshmallows from camping.

I really loved them, but when I make them again, I think I will cut the marshmallows in half or use mini marshmallows instead. That might reduce some of the gooey-ness. But if you like gooey-ness, you will love the large marshmallows! I hope you try them out. Let me know what you think.
Tuesday, April 7, 2009
Thank You Bakerella!!!

Bakerella is famous for her Cake Pops. She makes really cute pops for all of the holidays, and this time around I couldn’t resist trying them! My friend Sara and I spent an entire day decorating our cute little creations (some of which are pictured above).
We started by baking cakes from a cake mix. After the cakes baked and cooled, we crumbled them into a bowl and mixed them with frosting. Next, we rolled them into balls (about the size of a quarter). The balls needed to go in the freezer for a few minutes while we melted our candy melts. It was necessary to dip the lollipop sticks into the chocolate melts before putting them into the balls. This made it so the balls wouldn’t fall off the sticks. Once the balls were all on sticks, we placed them into foam blocks and put them back into the freezer. After a few minutes we were able to dip the cake pops into candy melts and decorate away. It’s amazing what you can do with cake sprinkles and confetti! For more details on how to make Bakerella’s Famous Cake Pops check out her website at http://bakerella.blogspot.com/2008/08/hope-these-put-smile-on-your-face.html

Saturday, March 21, 2009
Cake and Cookie Decorating Birthday Party
I got asked to teach cake decorating at a birthday party last night! I was totally in my element, not only with the cake decorating, but I love to hang out with the young girls. They are always so much fun to be around. I guess it makes me feel young again. My daughter was invited to this party and came home saying it was one of the best parties she had ever been to, so that was great to hear. I think everyone had a good time. I know I did.
At the beginning of the party, each girl got to paint a pot in bright Spring colors (since it was the first day of spring). They got pretty creative, and the pots were all very cute and unique. It was fun to see their personalities come out while painting.
While the adorable pots were drying, the girls were given aprons to decorate. All cake decorators need a good apron!
The girls even posed for a picture sporting their new aprons.
Next, I showed them a few cake decorating techniques using a delicious buttercream frosting, and various tips. I taught them a lot of the basics.
I had sugar cookies on sticks for them to decorate. They all did an AWESOME job. It was fun to see how different all of the cookies were. There sure was a lot of giggling going on.
The end result was phenomenal! The cookie bouquets turned out really well, and everyone had a great time.
Sunday, March 15, 2009
Banana Split Cake
Last weekend I took a trip to Denver to spend some time with my sister. We always have so much fun together. One of the things that we like to do when we get together is shop. So, we went to a couple hobby and home décor stores, and I came across a set of mini cake pans that I couldn’t pass up. I know, I know….I’m starting to wonder why I get so excited about such things. But I HAD to have this set. It is the Wilton Tasty-Fill Mini Cake Pan Set.
The set has 4 mini pans, and a recipe booklet. I immediately went to the recipe book to see what I could make, and this is what I came up with…….A DELICIOUS BANANA SPLIT CAKE!!! Now if I have you drooling over your computer screen, keep in mind that you (YES YOU!) can also make this cake. I will tell you step by step how to make it.
I started out with a basic banana cake recipe:
½ Cup Butter (softened)
1 Cup Sugar
1 egg
½ Cup Butter Milk
1 Cup Mashed Bananas
1 t. Soda
2 Cups Flour
¼ t. Salt
**Cream sugar, egg, and butter. Add bananas and soda. Add balance of ingredients. Mix well. Next put ½ cup of batter into each mini cake pan. Bake at 350 degrees for 20-25 minutes. Let cool before taking cakes out of pans.
Wrap the cakes in plastic wrap and put them in the freezer for a couple hours. Then pull them out to put the filling in, which is softened strawberry ice cream. Mmmmm….. After filling with strawberry ice cream, stack 2 cakes together (so the filling is inside). Return them to the freezer so the ice cream can set back up. Just before you are ready to serve these delicious little delicacies, pull them out of the freezer and frost with whipping cream. The only thing that could make this any better would be chocolate, but….. You are in luck! You pour ice cream toppings on top of the whipping cream. On this particular cake I used chocolate, strawberry, and caramel toppings. I also chopped up some peanuts, and topped it off with a cute little cherry. DELICIOUS!!!
Now, if you would like to give this cake a try, you can click on the link over to the left of my blog to purchase these fun pans. I imagine I will be using mine a lot!
Monday, March 2, 2009
Raspberry Lemon Gem Cookies

Most of us have made cookies before using a cake mix. Well, that's what I did this time around, but I put my own twist on things. I have always liked lemon cakes with raspberry filling, so I thought I would try a lemon COOKIE with a raspberry filling. I started with a lemon cake mix. Next I added 2 eggs, 2 Tablespoons Canola Oil, 2 Tablespoons water, and a teaspoon of Vanilla Flavoring. After mixing all the ingredients together, I dropped the dough by the teaspoonful on a lightly greased cookie sheet. I made a well in the center of each cookie, which I did by pressing in a greased melon baller. I'm sure there are other ways to do it. Then I put seedless raspberry preserves in the center of each one.