Monday, November 23, 2009

Black Friday Deals!!!!

I always love to go out shopping on Black Friday. Last year I took my daughter with me, and we had a great time. Our adventure started about 3:30 a.m. and ended about 9:00 a.m. I'm not sure if I like it because of the deals, but I know that I like the thrill of being in a crowd. And I really like to people watch. People get so crazy when they are trying to get a good deal on things. It's like their inner demons come out as they rush into the store and wrestle with others to get that one COOL gift.

My husband thinks that I am crazy for even wanting to go out so early. He would much rather stay in bed and shop online without the crowds. Now, I know that a lot of you are like my husband, and would rather stay in bed. So that is why I am doing this post. Amazon has already started their Black Friday Deals. They started today!

Amazon searched for the best Black Friday deals everywhere--including deals other stores are planning--so they can meet or beat their prices and bring them to you even earlier. These limited-supply offers will go quickly but they will add new ones throughout the day, every day this week, so you can skip the long lines and still save a bundle.

Wednesday, November 11, 2009

My Bread Cornucopia

A couple of years ago I had the opportunity of hosting Thanksgiving Dinner at my house. I was thrilled at the chance I had to decorate and get ready for such an event. I decided to make a Cornucopia out of bread to hold my home-made rolls. It was a little tricky to make, but in the end it turned out really cute and was well worth the effort. If any of you are feeling adventurous this year, I will post the instructions so that you can give it a try. I wish I would have taken step by step pictures as I made this, but unfortunately I wasn't a blogger back then. Hopefully you can do it with just the instructions. You can also email me if you have any questions.

Bread Cornucopia


Ingredients and materials:

Colander
Aluminum foil
Vegetable oil
2 loaves of frozen bread dough (I used my own bread dough)
Egg wash (used as paste)
Cooking brush


Wrap a colander with aluminum foil and spray with vegetable oil.

Let the frozen dough thaw (but not rise), then roll one over the colander. Use egg wash as a paste to attach the bread around the colander. Once it's attached, egg-wash the entire surface.

Cut the other loaf of bread dough into strips. Lay the strips of dough from the top to the bottom and tuck inside the colander. Lace the cornucopia with the dough strips, basketweave style.
Egg-wash the complete surface again and twist the bottom together. Bake at 400 degrees for 15 to 20 minutes, or until golden brown.

**This portion is just for show, not to be eaten.

Friday, November 6, 2009

In Loving Memory of Kevin's Youth.....My First Tombstone Cake

A dear friend of ours turned 40 today. His wife surprised him with a HUGE party. It was a funeral for his youth. I was so lucky to be able to make the cake. (Be sure to click on the picture to get a better look at the details.)

This cake was a lot bigger than it looks in the picture. It took more than 5 dozen eggs and a half a gallon of oil. The top portion of the tombstone was made using rice crispy treats (5 recipes). My husband, Jim, helped out a lot with this cake. He started by drafting it out on the computer for me, and he even marbled the fondant. Isn't he good?

Here is the back of the cake.

Almost everyone came to the party dressed in black.
Here is the birthday boy, Kevin... aka Bishop McEvoy. HAPPY BIRTHDAY!
It was such a fun party. I am glad that I got to be a part of it.

Monday, November 2, 2009

Pumpkin Sheet Cake With Cream Cheese Frosting


We got to go to many parties this weekend for Halloween and Birthdays. We ended up taking a Pumpkin Sheet Cake to two of the parties. I really enjoy pumpkin cake, pumpkin cookies, and really anything that is made of pumpkin. But this pumpkin sheet cake is the MOST DELICIOUS pumpkin cake that I have ever eaten. It is super moist. For this reason I am going to share the recipe with you. I think EVERYONE needs to try it.

Like the Candy Corn Sugar Cookies that I made, this recipe also comes from Tina at Mommy's Kitchen. I really love her site, because she has a monthly menu and she posts recipes for all of her meals. They are easy, practical meals that anybody can make. And of course, she also has delicious desserts and treats. Stepping into her blog is like stepping into her kitchen. So thank you Tina, for having such an AMAZING site.

Pumpkin Sheet Cake With Cream Cheese Frosting

15 oz. can pumpkin (I used Banana Squash that I had baked)
2 cups sugar
1 cup vegetable oil
4 eggs, beaten
2 cups flour
2 tsp. baking soda
2 tsp. cinnamon
1/4 tsp. nutmeg
1/2 tsp. salt

In a mixing bowl, beat the pumpkin, sugar, and oil. Add eggs and mix well. Combine the dry ingredients and add to the pumpkin mixture, beating until well blended. Pour into a greased 10X15 inch baking pan.


Bake for 25-35 minutes at 350 degrees.

Cool the cake completely and then frost it with the cream cheese frosting. Here's what you'll need for the frosting:

Cream Cheese Frosting:

1 stick butter, softened (1/2 cup)
8 oz. cream cheese, softened
1 1/2 tsp. vanilla
2 1/4 cups powdered sugar
5-6 tsp. milk

Beat the butter and cream cheese together. Add the vanilla and blend till smooth. Gradually add the powdered sugar and mix well. Add the milk a bit at a time until you get it to a spreadable consistency. Spread on top of the sheet cake.

You can also top this cake with some chopped pecans or walnuts, but that is optional.

I hope you give this cake a try and enjoy it as much as we did. DELICIOUS!

Wednesday, October 28, 2009

Candy Corn Sugar Cookies

Are you looking for that perfect, last minute Halloween treat to make? I came across these adorable sugar cookies on a fun blog that I follow. Tina over at Mommy’s Kitchen had them as a feature on her site this month.

You can make these cookies using your favorite sugar cookie recipe, or you can just purchase the refrigerated dough from your supermarket. Here is the recipe that I used (and I doubled it):

Ingredients:

3 ¼ cups all-purpose flour, sift before measuring

1 teaspoon baking soda

½ teaspoon salt

½ sup butter, room temperature

1 cup granulated sugar

1 egg

1 ½ teaspoons vanilla

½ cup sour cream

Preparation:

Into a bowl, sift together the sifted flour, baking soda, and salt. In a mixing bowl, cream butter, sugar, egg, and vanilla with an electric mixer. Beat for 2 minutes. Add sour cream and half of the sifted dry ingredients; beat 1 minute. Stir in remaining dry ingredients with a wooden spoon. Divide dough in thirds. Add orange food coloring to one of the portions, and yellow to another.

Line an 8-inch square pan with waxed paper and press yellow dough in the bottom.

Next, press the orange dough on top of the yellow dough.

Then press the plain white dough on top. Cover and refrigerate for 30 minutes.

Pull the dough out of the baking dish, and cut into ¼ inch thick slices.

Cut the slices into triangles, and place on a greased cookie sheet.

Bake at 400 degrees for 8-10 minutes. My cookies came out perfect at 8 minutes.
Happy Halloween!

Sunday, October 25, 2009

Here's A Little About Me!


I am crazy about a lot of things. I am especially crazy about my adorable kids and my wonderful husband. Their love, kindness, and smiles are enough to make anyone happy. I am crazy about baking, and filling my home with a yummy aroma that is inviting to anyone. I am crazy about serving others. The joy that I get from doing acts of kindness for others is unbelievable. Most of all, I am crazy about life!


Saturday, October 24, 2009

The Easiest Pumpkin Chocolate Chip Cookies Ever

These pumpkin chocolate chip cookies are quick, easy, and delicious. Since pumpkins seem to be in abundance this time of year, you can either use fresh pumpkin or canned pumpkin. I chose to use canned pumpkin.

3 Simple Ingredients:

1 box Spice Cake Mix
1 Small Can (15 oz.) Pumpkin
1 12 oz. bag of Chocolate Chips


Start by mixing the pumpkin and the cake mix together. You don't need the oil or eggs. Just the dry mix.

Mix it together well, and add the chocolate chips.

Mix well, and scoop onto a greased cookie sheet. I always use a non stick cooking spray.

Bake in a 350 degree oven for 10-12 minutes. Your home will smell inviting, and you will have a delicious treat! I hope you enjoy these cookies as much as my kids do.

Friday, October 9, 2009

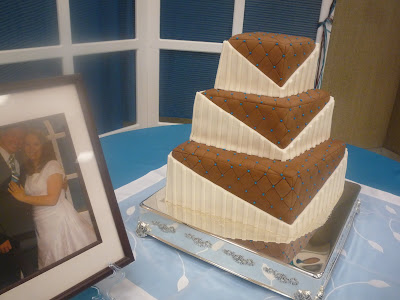
Megan's Diamond Shaped Wedding Cake

Tonight was Megan's wedding reception, and I was able to make her cake for her. This three-tiered cake was amazing! The top layer was a white cake with a raspberry filling. The middle layer was a chocolate cake with chocolate buttercream filling, and the bottom layer was a carrot cake with a buttercream filling. I did chocolate fondant for the first time ever. And I was extremely surprised at how easy it was to make and work with. I will share the recipe at the bottom of this post. Be sure to click on the top picture to get a better view of the details.
The reception was beautiful! I was really glad to be a part of it.

For the Chocolate Fondant, I mostly followed the Wilton recipe. I changed it by using real chocolate instead of the chocolate candy melts. The texture was perfect.

Wilton Chocolate Fondant

Ingredients:

14 ounces dark cocoa candy melts
1/2 cup light corn syrup
24 ounce package Wilton Fondant
Brown Icing Color (optional)
Black Icing Color (optional)

Makes: About 2 pounds chocolate fondant (this cake took about 10 pounds).

Instructions:
Melt Candy Melts following package directions. Add corn syrup; stir to blend. Turn out mixture onto waxed paper; let stand at room temperature to dry and harden several hours. Wrap well and store at room temperature until ready to continue with recipe.

Knead small portions of candy mixture until soft and pliable. Knead softened mixture into fondant until smooth and evenly colored. If darker color is desired, knead in icing color.

Wednesday, September 30, 2009

Brown and Blue Wedding Desserts.....It Was Megan's Great Day!

My friend Megan got married today, and I made some goodies for her special day. With brown and blue as the colors, the possibilities were endless. I started with some cupcakes.....white and chocolate. The chocolate cupcakes had a rich chocolate buttercream frosting with grated chocolate on top. The white cupcakes were topped with a buttercream frosting also.
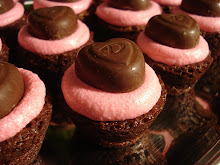
I also made my Mint Brownie Bites. When I made these before, I was able to just buy Dove Chocolate hearts, because it was close to Valentines Day. Well, I learned that chocolate hearts are impossible to find in the fall. I ended up buying a heart candy mold so that I could make my own chocolate hearts. They were delicious!
I made Cake Balls with a Spice Cake and Cream Cheese frosting.
And I made Cheese Cake Balls. I will have to give you detailed instructions on these little delicacies in a later post. But, I can tell you that they melt in your mouth. The cheesecake was covered with Milk Chocolate, and topped with toasted hazelnuts.

What a beautiful Wedding. Thank you Megan and Taylor, for letting me be a part of your special day.
My next project......Megan's Wedding Cake for her reception next week! It will be a lot of fun.

Sunday, September 20, 2009

Ashley's Cupcake Decorating Birthday Party

Ashley had an AWESOME birthday party this weekend!
We had a great group of kids, and we kept things simple. We had the kids do some balloon relay races. They also got to take a swing at a pinata.
The big attraction of the party was cupcake decorating. They had so many choices to make! They could take a strawberry, white, or chocolate cupcake.
They could top it off with strawberry, vanilla, or chocolate frosting.
The many toppings were endless. The kids could choose from M&M's, Dots, Candy Corns, Gummy Bears, and Chocolate chips.
And every child likes sprinkles, right?
Here they are making their creations.
And the pictures say it all......


And yes, I even made one!
What a great day! Happy Birthday Ashley!

Monday, September 14, 2009

A What? A Peach Upside Down Cake!

My Dad gave me some peaches the other day off of his tree. I didn't have quite enough to get a canning operation going, so I went on a quest to find a yummy peach dessert recipe. I came across a lot of peach pie recipes, and they all looked great. But when I found this recipe for a Peach Upside Down Cake, I just had to try it. It turned out AMAZING! It was almost like a peach cobbler, and was especially wonderful served warm with a scoop of ice cream.

Start by heating your oven to 325 degrees. Butter a 9-inch square or round cake pan, or spray with baking spray. Peel and pit the peaches, slice thinly.

Fruit Mixture:
3 peaches, peeled, thinly sliced, about 2 cups of slices (I think I used 4 or 5 peaches)
1/2 cup light brown sugar, packed
1 scant teaspoon ground cinnamon
3 Tablespoons melted butter

Toss the peaches with the brown sugar, 1 teaspoon of cinnamon, and 3 tablespoons of melted butter. Arrange the peach mixture in the prepared baking pan.
Cake:
1 3/4 cup all-purpose flour, stirred before measuring
1/4 teaspoon salt
2 teaspoons baking powder
1/2 teaspoon cinnamon
1/2 cup butter, room temperature
3/4 cup granulated sugar
2 large eggs
1/2 teaspoon vanilla extract
1/4 teaspoon almond extract
2/3 cup milk

Combine the flour, salt, baking powder, and 1 teaspoon cinnamon in a bowl. In a large mixing bowl with electric mixer, beat butter with the sugar until light and fluffy. Beat in eggs, vanilla extract, and almond flavoring. Add the flour mixture to the sugar mixture, alternating with the milk, beating just until blended. Spoon the batter over the peach slices.
Gently spread it around to cover the peaches.
Bake for 55 to 65 minutes, or until a toothpick inserted in the center of the cake comes out clean.
Invert the hot cake onto a platter or cake plate and let stand for about 5 minutes. Remove the pan and scrape up any fruit slices clinging to the pan and arrnage them over the cake.
Like I said before, it was especially wonderful served warm with a scoop of ice cream.