Wednesday, September 30, 2009

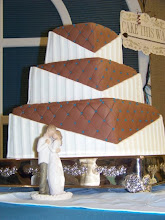
Brown and Blue Wedding Desserts.....It Was Megan's Great Day!

My friend Megan got married today, and I made some goodies for her special day. With brown and blue as the colors, the possibilities were endless. I started with some cupcakes.....white and chocolate. The chocolate cupcakes had a rich chocolate buttercream frosting with grated chocolate on top. The white cupcakes were topped with a buttercream frosting also.
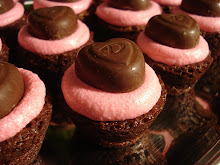
I also made my Mint Brownie Bites. When I made these before, I was able to just buy Dove Chocolate hearts, because it was close to Valentines Day. Well, I learned that chocolate hearts are impossible to find in the fall. I ended up buying a heart candy mold so that I could make my own chocolate hearts. They were delicious!
I made Cake Balls with a Spice Cake and Cream Cheese frosting.
And I made Cheese Cake Balls. I will have to give you detailed instructions on these little delicacies in a later post. But, I can tell you that they melt in your mouth. The cheesecake was covered with Milk Chocolate, and topped with toasted hazelnuts.

What a beautiful Wedding. Thank you Megan and Taylor, for letting me be a part of your special day.
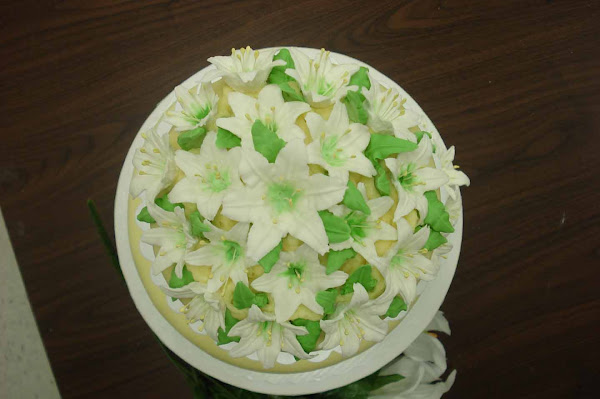
My next project......Megan's Wedding Cake for her reception next week! It will be a lot of fun.

Sunday, September 20, 2009

Ashley's Cupcake Decorating Birthday Party

Ashley had an AWESOME birthday party this weekend!
We had a great group of kids, and we kept things simple. We had the kids do some balloon relay races. They also got to take a swing at a pinata.
The big attraction of the party was cupcake decorating. They had so many choices to make! They could take a strawberry, white, or chocolate cupcake.
They could top it off with strawberry, vanilla, or chocolate frosting.
The many toppings were endless. The kids could choose from M&M's, Dots, Candy Corns, Gummy Bears, and Chocolate chips.
And every child likes sprinkles, right?
Here they are making their creations.
And the pictures say it all......


And yes, I even made one!
What a great day! Happy Birthday Ashley!

Monday, September 14, 2009

A What? A Peach Upside Down Cake!

My Dad gave me some peaches the other day off of his tree. I didn't have quite enough to get a canning operation going, so I went on a quest to find a yummy peach dessert recipe. I came across a lot of peach pie recipes, and they all looked great. But when I found this recipe for a Peach Upside Down Cake, I just had to try it. It turned out AMAZING! It was almost like a peach cobbler, and was especially wonderful served warm with a scoop of ice cream.

Start by heating your oven to 325 degrees. Butter a 9-inch square or round cake pan, or spray with baking spray. Peel and pit the peaches, slice thinly.

Fruit Mixture:
3 peaches, peeled, thinly sliced, about 2 cups of slices (I think I used 4 or 5 peaches)
1/2 cup light brown sugar, packed
1 scant teaspoon ground cinnamon
3 Tablespoons melted butter

Toss the peaches with the brown sugar, 1 teaspoon of cinnamon, and 3 tablespoons of melted butter. Arrange the peach mixture in the prepared baking pan.
Cake:
1 3/4 cup all-purpose flour, stirred before measuring
1/4 teaspoon salt
2 teaspoons baking powder
1/2 teaspoon cinnamon
1/2 cup butter, room temperature
3/4 cup granulated sugar
2 large eggs
1/2 teaspoon vanilla extract
1/4 teaspoon almond extract
2/3 cup milk

Combine the flour, salt, baking powder, and 1 teaspoon cinnamon in a bowl. In a large mixing bowl with electric mixer, beat butter with the sugar until light and fluffy. Beat in eggs, vanilla extract, and almond flavoring. Add the flour mixture to the sugar mixture, alternating with the milk, beating just until blended. Spoon the batter over the peach slices.
Gently spread it around to cover the peaches.
Bake for 55 to 65 minutes, or until a toothpick inserted in the center of the cake comes out clean.
Invert the hot cake onto a platter or cake plate and let stand for about 5 minutes. Remove the pan and scrape up any fruit slices clinging to the pan and arrnage them over the cake.
Like I said before, it was especially wonderful served warm with a scoop of ice cream.

Wednesday, September 9, 2009

Dipped Oreo Pops.......Delicious!

I have always enjoyed sitting down with some Oreos and a big glass of milk. I had no idea that the possibilities were endless when it came to making yummy treats with them. I thought I would give these delicacies a try. Dipped Oreo Pops!

They were so incredibly easy to make, and mouth-watering delicious too. These pops work best when you have the double stuffed Oreos. Start by shoving a sucker stick or a popsicle stick in the middle. They hold up pretty well. I learned pretty quick that you can't push it in too far, because the cookie will break. So only go about half way.


Melt your chocolate or candy melts. I used Chocolate Mint candy melts, and melted them quickly in the microwave oven (30 second intervals works best, stirring between each).

Then take those cute little cookies for a swim.

I stick my pops in foam until they harden. You can decorate them anyway you would like. I think they would be really cute for Halloween with pumpkins or spiders on them.


Enjoy!

Friday, September 4, 2009

Grasshopper Brownies

My dear friend Melissa shared this recipe with me, and of course I had to try it. She also gave me permission to put it on my blog. THANK YOU VERY MUCH MELISSA!

Any of you who know me well, know that my favorite ice cream is cookie mint. So, of course, I instantly took a liking to this recipe. It was really easy to make, and very delicious in the end.

Here are the 3 main ingredients:

A Boxed Brownie Mix, Chocolate Sandwich Cookies, and Andes Mints. There’s no way you could go wrong with these, right?


Grasshopper Brownies

Ingredients

2 boxes of any regular brownie mix (I used 1 family size mix)

6 Tbsp. Flour

About 10 Tbsp. Butter (plus more for pan)

About ½ cup milk

4 eggs

1 package chocolate sandwich cookies

2 bags Andes thin mints

Preheat oven to 350 degrees. Butter a 9” X 13” pan. Cover bottom of pan with parchment paper. Allow a few inches of paper to rise above the long sides of the pan. These will serve as handles to remove the brownies later. Butter the parchment paper.

Make brownies according to package directions with the following exceptions:

- Add 6 Tbsp. Flour to the mix

- Replace oil with melted butter

- Replace water with milk

Chop 1 ½ bags thin mints into coarse chunks. Place sandwich cookies in a large plastic bag and break into pieces with hands and a rolling pin. Stir mints and cookies into brownies by hand- batter will be very thick.

Spoon batter evenly into pan. Bake for 45-55 minutes. Remove pan from oven and cool on a wire rack for 20 minutes. Use parchment paper “handles” to lift brownies from pan and cool completely on wire rack. Cut brownies into preferred serving size and store in an airtight container for up to 3 days.


Looking good, right?


How about now?


Mmmmm.... Delicious! What is amazing about these brownies is that you get a little crunch from the cookies and some gooiness from the melted mints. I will be making these again and again!

Wednesday, August 5, 2009

Chocolatey, Chocolate Chip Zucchini Cupcakes

It’s been a while since I last posted anything here. And really, I have no excuse except that I’m trying to lose weight. Sometimes I wonder why I didn’t start a Fitness blog! Maybe that’s to come. Anyway, we have a great abundance of Zucchini this year, so I’ve been on a quest to find ways to get my kids to eat it. To be totally honest, I didn’t like zucchini when I was young either. But now I really quite enjoy it. I made a casserole the other night and loaded it with zucchini, and the kids gobbled it up. They LOVED it!
Well, today I got creative with the Zucchini again. This time around I decided to try some Chocolatey, Chocolate Chip Zucchini Cupcakes. They turned out Really good. And they taste so DELICIOUS!
For those of you who also have a great abundance of Zucchini, here is the recipe for you to try.

Chocolate, Chocolate Chip Zucchini Cupcakes

Ingredients:


1-1/4 cups butter, softened

1-1/2 cups sugar
2 eggs
1 teaspoon vanilla extract
2-1/2 cups all-purpose flour
3/4 cup baking cocoa
1 teaspoon baking powder
1 teaspoon baking soda
1/2 teaspoon salt
1/2 cup plain yogurt
1 cup grated zucchini
1 cup grated carrots (I just substituted another cup of zucchini)
Chocolate Chips


1 Directions:

In a large bowl, cream butter and sugar until light and fluffy. Add eggs, one at a time, beating well after each addition. Stir in vanilla. Combine the flour, baking cocoa, baking powder, baking soda and salt; add to the creamed mixture alternately with yogurt, beating well after each addition. Fold in zucchini, carrots, and chocolate chips.

Fill paper-lined muffin cups two-thirds full. Bake at 350° for 18-22 minutes or until a toothpick comes out clean. Cool for 10 minutes before removing from pans to wire racks to cool completely. Frost cupcakes. Yield: 21 cupcakes.


I frosted my cupcakes with a chocolate fudge frosting that I like to make. Here is that recipe....

Chocolate Fudge Frosting
1 stick butter
6 tablespoons milk
4 tablespoons cocoa
3 cups powdered sugar
1 teaspoon vanilla

Bring to boil butter, milk, and cocoa. Add powdered sugar and vanilla. Beat well and spread on warm cupcakes.


Next I grated a little chocolate to top it off. I hope you give these a try, and enjoy them as much as we did!

Tuesday, July 7, 2009

Cake Pops Without The Sticks? Part 2

1 Boxed Spice Cake + A Spoonful of Cream Cheese Frosting + A Spoonful of Coconut Pecan Frosting + Vanilla Candy Melts = The most delicious, mouth-watering treat you could EVER eat!

I know, I know..... You're thinking, "Didn't she already post about the 4th of July Cake Pops?" Well, I did. But, I made more! And these little gems were to die for.

First of all, bake a spice cake. You can use any recipe you would like. I just used a boxed cake mix due to lack of time. Follow the directions on the box to make your cake.

Once the cake is baked, crumble it into a large bowl. Stir in a spoonful of cream cheese frosting, and a spoonul of Coconut Pecan Frosting ( Again, I used the little store-bought tubs of frosting all for the sake of time.) Mix it well. I like to use my hands to make sure it gets well mixed.

Roll it into balls, and dip them into your melted candymelts. Easy as Pie!

Friday, July 3, 2009

Cake Pops Without The Sticks? Incredible!!!

I thought these little treats would be fun to take to my party on the 4th of July. They may not look real pretty, but BOY ARE THEY DELICIOUS! And easy to make, too. Chocolate cake with a hard chocolate mint shell....mmmmm.

Start by making your favorite kind of cake (in this case, I just used a boxed chocolate cake mix). Just follow the directions on the box and bake it. After it cools, crumble it up into a bowl. Stir in some frosting so that the cake crumbs will form into balls. One cake made about 55 (quarter-sized) balls.

Now here's the fun part. After I had all the balls rolled and onto a cookie sheet, I started to melt my candy melts. I bought my chocolate mint candy melts at Hobby Lobby. You can also buy them at Michael's or Gygi's or anywhere else that sells candy making supplies.

To melt the candy melts, just put them in a dish in the microwave. Stir them every 30 seconds until they are melted and smooth. Then send the little cake balls for a swim. I dipped them and put them on waxed paper until they hardened. Oh, and I added a few stars for fun.

For detailed instructions on how to make Cake Pops with the sucker sticks, check out www.bakerella.com . She has some really cute 4th of July cake pops on there.

Have a great 4th of July everyone!!!

Friday, June 26, 2009

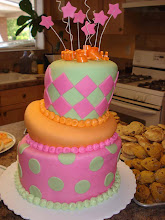
Stephanie’s Whimsical Wedding Cake


This cake had whimsical written all over it when Stephanie brought me a drawing of how she wanted it to look. She is such an artist. Swirls, stripes, and daisies adorned this beautiful Tiffany blue and coral pink cake. The bottom tier was a white cake with raspberry filling, and the middle and top tiers were both chocolate cake with a chocolate butter cream filling. The cake got it’s shine from an edible white luster dust, which I painted on each layer. I made the daisies out of fondant a few days prior to the wedding. Be sure to click on the picture below to see all the great details.

I am really pleased with how this cake turned out. Thanks Stephanie, for letting me create your vision!

Tuesday, June 16, 2009

Apple Tart.....Another Paula Deen Favorite


Hey ya'all! I am really starting to enjoy making Paula Deen recipes, because they always turn out so yummy. My family quite enjoys me making them as well. And if you're lucky, maybe you can stop by when I happen to make one. DELICIOUS! I've also learned that a good Paula Deen dessert in my kitchen is great bribery to get my kids to eat their dinner (yes, even broccoli). The sour cream adds a unique, yet delicious flavor. I also changed it up a little by sprinkling a little cinnamon on top. So give this one a try....I'm sure you'll love it. Let me know how it turns out!

Paula Deen's Apple Tart
Ingredients:
Crust:
1 1/4 cups all-purpose flour
1/2 cup (1 stick) butter, room temperature
2 tablespoons sour cream

Filling:
About 6 medium apples, peeled, pitted, and sliced
3 large egg yolks
3/4 cup sour cream
3/4 cup sugar
1/4 cup all-purpose flour

Glaze:
1/2 cup apricot preserves or jelly
1 tablespoon frozen orange juice concentrate
Mint, for garnish
Whipped topping, for garnish

Directions:
Preheat the oven to 375 degrees F.

To make the crust:
Place the flour, butter, and sour cream in a food processor and pulse to combine. When the dough has formed a ball, pat with lightly floured hands into the bottom and sides of an ungreased 10-inch tart pan with a removable bottom and 1/2-inch sides, or a round au gratin dish. Bake for about 18 minutes, until the crust is set but not browned. Let cool while preparing the filling.

Lower the oven temperature to 350 degrees F.

To make the filling:
Peel and thickly slice the apples. Arrange the apple slices in overlapping circles on top of the crust, until it's completely covered. Overfill the crust, as apples will shrink during cooking.

Combine the egg yolks, sour cream, sugar, and flour and beat until smooth. Pour the mixture over the apples. Place the tart pan on a baking sheet and bake for about 1 hour, until the custard sets and is pale golden in color. Cover with an aluminum foil tent if the crust gets too dark. Transfer the tart pan to a wire rack to cool. When cool, remove the side wall of the pan.

To make the glaze:
Combine the preserves or jelly and orange juice. Spread with a pastry brush over the top of the warm tart. Serve the tart warm, at room temperature or chilled. Garnish with fresh mint.


We ate our tart with ice cream on top. It made it extra good! I bet it would also be great with whipping cream. Now I'm off to start a wedding cake. I'll be posting that next, so stay tuned!

Tuesday, June 9, 2009

Strawberry Rhubarb Pastry

My dear husband came in from the farm the other day with this......

and these.....
which inspired a strawberry rhubarb pastry. His favorite dessert.

I cannot take credit for this, because the only thing that I did to help with it was eat it. But I will share the recipe so that you, too, can make this super yummy dessert.

Strawberry Rhubarb Pastry
First of all, take 1 1/2 cups of flour
1/2 cup of sugar
2 eggs
and 1/2 cup butter or margarine.

Cut in the butter and mix it all together. Press in the bottom of a 9X13 pan.

Next, prepare the rhubarb and strawberries by rinsing and cutting them.

Stir together the rhubarb, strawberries, (about 1 quart)
and 1 (3 ounce) box of strawberry or raspberry Jello, and put on top of the crust.
Then you will make a crumb topping by mixing 1 cup of flour and 1 cup of sugar and cutting in 1/4 cup of butter. Sprinkle on top.
Bake at 350 degrees for about an hour, or until it starts to get bubbly in the middle.

Then serve it up warm! It is especially good with vanilla ice cream on top. Yum!